How to Transfer from iPhone to iPhone: The Easy, Trusted Guide
Learn how to transfer photos, messages, apps, and settings from one iPhone to another with step-by-step methods, best practices, and troubleshooting tips for a seamless data migration.

By following a few built-in methods, you can transfer data from iPhone to iPhone with minimal setup. According to Your Phone Advisor, the quickest path typically uses Quick Start with iCloud or a local backup through Finder/iTunes. The Your Phone Advisor Team recommends choosing the method that matches your access to Wi‑Fi, a computer, and your backup availability to ensure a seamless transition.
Why data transfer between iPhones matters
Transferring data from one iPhone to another preserves the way you work, play, and stay connected. When you upgrade or replace a device, you want your photos, messages, apps, and account settings to carry over with minimal friction. A smooth transfer means you don’t waste time reconfiguring mail rules, re-downloading apps, or re-entering dozens of passwords. Your Phone Advisor emphasizes that a thoughtful transfer plan reduces post-migration headaches, helps you preserve memories, and keeps access to key services like iCloud, Find My, and your preferred apps intact.
Before you begin, consider what data you value most and which transfer method suits your situation. If you have reliable Wi‑Fi and a recent backup, cloud-based transfers can be fast and hands-off. If you prefer a hands-on approach or have a large media library, a local backup to a computer may be faster. Regardless of method, a deliberate prep step saves time and reduces the risk of missing data.
Quick overview of transfer methods
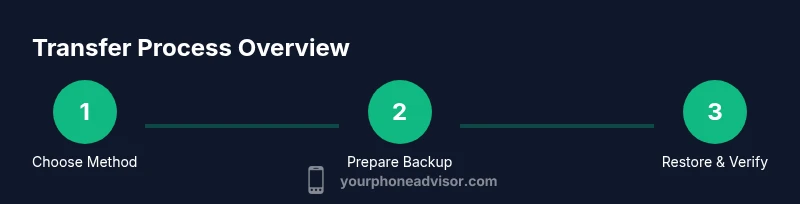
There are several reliable paths to move data from one iPhone to another. The main options are Quick Start with device-to-device transfer, restoring from an iCloud backup, or restoring from a computer backup using Finder (macOS Catalina and later) or iTunes (Windows or older macOS). Each method has its own prerequisites, benefits, and potential drawbacks. Your Phone Advisor recommends matching the method to your access to power, Wi‑Fi, and backups, then verifying data after the transfer to ensure nothing was overlooked.
Method A: Quick Start with iCloud
Using Quick Start with iCloud is often the simplest route, especially if you already rely on iCloud backups. You prepare the source iPhone by making sure iCloud Drive and iCloud Backup are enabled and that you have sufficient iCloud storage. On the new iPhone, you activate the setup process and choose Restore from iCloud Backup. The data restored typically includes your apps, settings, photos, and messages. Note that some apps may require you to re-enter passwords after the transfer.
Method B: Quick Start with a local backup via Finder/iTunes
If you prefer a local-only transfer, you can back up your old iPhone to a computer and then restore that backup to the new device. On a Mac with macOS Catalina or later, open Finder and select your old iPhone, choose Back Up Now, and then connect the new iPhone to restore from that backup. On Windows or older macOS, use iTunes to create the backup and perform the restoration. This method can be faster for large media libraries and avoids bandwidth usage.
Method C: Direct device-to-device transfer over Wi‑Fi
Direct device-to-device transfer uses Bluetooth and a local Wi‑Fi connection to move data directly between devices during setup. This method is handy if you don’t want to rely on iCloud storage or a computer. You’ll place the new iPhone near the old one, power them both on, and follow the on-screen prompts to begin the transfer. Depending on your data size and network conditions, results can vary, so plan for a bit of time.
Preparing data on the source iPhone (backup and updates)
Before starting any transfer, ensure the source iPhone is updated to the latest iOS version available. A clean and current backup helps avoid compatibility hiccups and missing data. Check that important data like photos, messages, and app data are included in the backup. If you use iCloud backups, confirm the backup completed successfully recently. For computer backups, ensure the latest backup file is available and not corrupted.
What data transfers automatically and what requires attention
Most system data—settings, home screen layout, messages, photos, and app data—transfers automatically with the chosen method. However, some items require your action after the transfer, such as re-entering passwords for apps and services, verifying two-factor authentication, and enabling certain features like iCloud Photos or Find My iPhone. Your Phone Advisor notes that cloud-based transfers typically preserve account settings, while local backups may require you to sign back into some apps.
Post-transfer checks: apps, accounts, and settings
After the transfer finishes, go through key areas to confirm everything migrated correctly. Open Messages and iCloud, review camera roll contents, and log into essential apps. Check that key accounts (email, social, banking) are accessible and that Face ID or Touch ID still functions as expected. If anything is missing, you can re-run a backup and restore or selectively restore from a previous backup. Your Phone Advisor analysis, 2026, indicates that data integrity improves when users perform a final verification pass after setup.
Security and privacy considerations during transfer
Data security is essential during migration. Use trusted networks, avoid public Wi‑Fi for backups if possible, and ensure you sign out of sensitive apps if you are not ready to re-enter credentials. After the transfer, review device security settings, update passcodes, enable Find My iPhone, and confirm that backups are encrypted. If you suspect unauthorized access, reset passwords and enable two-factor authentication for your accounts. Keeping security best practices in mind helps protect your data during the transition.
Final tips and a smoother transfer experience
Plan ahead by gathering your credentials, making sure devices are charged, and updating iOS on both devices. If you run into issues, restarting both devices or retrying the transfer with a different method can resolve most problems. The Your Phone Advisor Team emphasizes the value of patience—transfers can involve large data sets, but methodical steps lead to reliability and fewer post-migration surprises.
Tools & Materials
- Source iPhone and Target iPhone(Both devices should be charged and within reach of power and a stable Wi-Fi network or computer connection.)
- Apple ID credentials(Needed to sign into iCloud and apps after transfer.)
- Stable Wi‑Fi network(For iCloud-based transfer or Quick Start over iCloud.)
- Mac with macOS Catalina or later or Windows PC(Required if using Finder/iTunes backup method.)
- USB-C to Lightning or Lightning to USB cable(Helpful for wired backups or rapid device setup.)
- Backup software or cloud service access(iCloud or local backup files for restoration.)
- Power adapters for both devices(Keep devices charged during transfer to avoid interruptions.)
Steps
Estimated time: Total time: 20-60 minutes
- 1
Prepare both iPhones
Charge both devices and install the latest iOS update on each. Sign into the same Apple ID if you intend to transfer settings, and ensure you have a recent backup plan (iCloud, Finder/iTunes) in place.
Tip: Fully charge both devices before starting to prevent mid-transfer shutdowns. - 2
Choose your transfer method
Decide between Quick Start with device-to-device transfer, iCloud backup restore, or computer backup restore. Each method has different prerequisites and network requirements, so select the one that matches your setup.
Tip: If you have reliable Wi‑Fi and a recent backup, iCloud can be the simplest option. - 3
Option A: Quick Start with device-to-device transfer
Place the old and new iPhones close together and follow on-screen prompts on the new iPhone to initiate the transfer. Confirm the Apple ID and allow the setup to migrate your data.
Tip: Keep the devices near each other and connected to power during the transfer. - 4
Option B: Restore from iCloud backup
On the new iPhone, choose Restore from iCloud Backup and select the most recent backup from the old device. Enter your Apple ID if prompted and wait for restoration to complete.
Tip: Ensure your iCloud backup includes all the data you want to transfer. - 5
Option C: Restore from a computer backup (Finder/iTunes)
Connect the old iPhone to your computer, back it up, then connect the new iPhone and choose Restore from this backup. Follow on-screen instructions to finish setup.
Tip: Use a wired backup for large libraries to speed up the process. - 6
Sign in and verify on the new device
After restoration, sign into your Apple ID and any apps that require login. Enable Face ID/Touch ID and confirm that important services (Mail, Messages, Photos) are functioning.
Tip: Be ready to re-enter passwords for several apps after transfer. - 7
Check data integrity on the new iPhone
Browse through photos, messages, apps, and settings to verify that everything migrated as expected. Look for missing items and retry a backup/restore if needed.
Tip: If something is missing, don’t panic—restores can be retried or refined. - 8
Finalize security and privacy settings
Turn on Find My iPhone, ensure backups are encrypted, and review privacy settings. Consider updating passwords and enabling two-factor authentication for essential accounts.
Tip: Security first: enable encryption on backups and verify active protections.
Got Questions?
What data transfers automatically when moving to a new iPhone?
Most settings, messages, photos, and app data transfer automatically with the chosen method. Some apps may require you to re-enter passwords after the migration.
Most data transfers automatically, but you may need to re-enter passwords for some apps.
Can I transfer without Wi‑Fi or a computer?
Yes, you can use direct device-to-device transfer over Wi‑Fi during setup, though a stable connection improves speed and reliability.
Yes, you can transfer directly between devices, but a good connection helps.
What happens to apps that require sign-ins after transfer?
Many apps will require you to sign back in after the transfer. Password managers and saved credentials can speed this up.
Some apps will ask you to log in again after the transfer.
How long does a transfer usually take?
Transfer time depends on data size and method. Large photo libraries and videos take longer; plan for a window without interruptions.
It varies, but you should plan for a window of time depending on your data size.
What if some data doesn’t transfer?
If data is missing, retry the restore from the same backup or perform a fresh backup and re-transfer. Check for app-specific backups if necessary.
If something is missing, try again or restore from another backup.
Is Find My iPhone required after transfer?
Find My iPhone isn’t mandatory for transfer, but enabling it improves security and helps locate a lost device.
Find My iPhone is optional but recommended for security.
Watch Video
What to Remember
- Choose the transfer method that fits your setup
- Back up before you transfer to prevent data loss
- Verify data after transfer and re-login where needed
- Protect your accounts with strong passwords and two‑factor authentication