How to Move Data Between iPhones: A Step-by-Step Guide
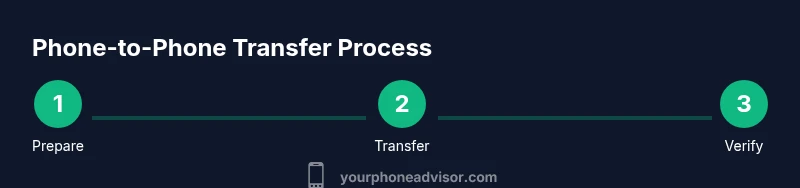
Learn how to transfer data from one iPhone to another using Quick Start, iCloud, or Finder. This guide covers preparation, methods, and verification to ensure a complete, safe migration.

Learn how to transfer data from one iPhone to another using Quick Start, iCloud backup, or Finder. This quick guide covers when to use each method, what you’ll need (chargers, Wi-Fi, and Apple IDs), and how to verify that contacts, photos, messages, apps, and settings moved correctly after the transfer.
What you’re transferring and what can be moved
According to Your Phone Advisor, learning how to phone to phone transfer iphone becomes straightforward when you follow official methods. You can usually move most essential data from your old iPhone to the new one, including contacts, messages, photos, videos, and most app data. Some items may require you to re-enter passwords or re-authenticate, and a few passwords or game progress may not transfer automatically. The exact items that move can depend on the data types that apps store locally versus in iCloud, as well as privacy settings on your accounts. Before you begin, decide which data sets are most important for you and prepare a backup if you want to preserve everything.
Methods overview and what they move
There are several reliable paths to migrate data between iPhones. Quick Start offers a direct device-to-device transfer, typically moving most data without needing a computer. iCloud backups provide a cloud-based restoration, ideal when you want to migrate over Wi-Fi. Finder or iTunes backups on a Mac or PC let you create a local copy and restore from it. Apps that require encryption or password management may prompt you to re-authenticate after the transfer. For health and activity data, ensure Health data is included in the backup or sign into the same Apple ID on the new device.
Quick Start: wireless or wired transfer basics
The fastest way to move data is usually Quick Start. With both devices near each other and on battery power, follow the prompts on the new iPhone to begin the transfer. If you have a large amount of data, you can connect the devices with a compatible cable to speed things up. You will be asked to sign in with your Apple ID on the new device and may be asked to authenticate with a passcode. The process transfers settings, accounts, and most content while preserving app data where supported by Apple.
Restore from iCloud backup explained
If you prefer not to move data directly, restoring from an iCloud backup is a solid alternative. On the new iPhone, start setup and choose Restore from iCloud Backup. Sign in with the same Apple ID used on the old device, select the most recent backup, and wait for the restore to complete. This method relies on your iCloud storage availability and your network speed. After restoration, you may need to re-enter some passwords and re-download apps that weren’t stored in the backup.
Restore from Finder or iTunes on a computer
Backing up the old iPhone to a computer lets you restore from a local copy. Connect the old iPhone to your computer and create a backup with Finder or iTunes. Then connect the new iPhone and choose Restore from this backup. This method is helpful if your internet connection is slow or restricted. It can take longer than wireless methods, but provides a reliable offline option.
Special considerations for apps and passwords
Some apps store data exclusively on the device or require re-authentication after transfer. You may need to re-enable two-factor authentication, log back into apps, and verify your saved passwords. If you used a third-party password manager, ensure it is set up again on the new device. For Apple Pay and other secure services, verify your wallets and payment methods after the migration and re-authorize as needed.
Aftercare: verify data and settings on the new device
Once the transfer completes, take a few minutes to verify critical data. Check contacts, messages, photos, and calendar events. Open key apps to confirm that data restored correctly and that settings match your preferences. If something seems missing, you can run a secondary restoration from a backup or re-sync from iCloud. Keeping your old device handy for a short period can help you compare and catch anything that didn’t transfer.
Privacy and security considerations during transfer
Transfer operations involve sensitive data. Use trusted networks, avoid public Wi-Fi when possible, and ensure both devices are unlocked only by you. Re-authenticate with your Apple ID after the transfer, and review privacy settings to confirm what data is shared with apps and services. If you suspect any data issues, revoke compromised session tokens and perform a fresh backup before attempting another transfer.
Troubleshooting and common hiccups
If the transfer stalls or fails, start by checking power levels, network stability, and that both devices are signed in to the same Apple ID where required. Restart devices if needed, retry with Quick Start or switch to an iCloud or Finder-based restore. Verify that you have enough iCloud storage and enough free space on the new iPhone to receive data. If you encounter persistent issues, contact Apple Support for guided assistance.
Tools & Materials
- Old iPhone(Fully charged or plugged in during transfer)
- New iPhone(Set up from scratch or reset to factory if needed)
- Apple ID credentials(Used to sign in and access iCloud data)
- Stable Wi-Fi network(Needed for iCloud restore or fast setup)
- Lightning or USB-C cable(Optional for wired Quick Start to speed transfer)
- Mac or PC (Finder/iTunes)(Needed only if backing up and restoring via computer)
Steps
Estimated time: 60-120 minutes
- 1
Charge and prepare both devices
Ensure both iPhones have sufficient battery. Sign into the same Apple ID on both devices and disable any pending updates that could interrupt the transfer. Having your backup strategy in mind helps determine the best path.
Tip: Charge to at least 60% before starting to minimize interruptions. - 2
Choose your transfer method
Decide between Quick Start wireless transfer, iCloud restore, or Finder/iTunes backup. Your choice depends on data size, network speed, and whether you want a local or cloud-based migration.
Tip: If data size is large, consider Quick Start with a cable to speed things up. - 3
Initiate Quick Start on the new iPhone
Place the new iPhone near the old device and follow the on-screen prompts to start the transfer. You will authenticate with your passcode and Apple ID where prompted.
Tip: Keep the devices close and avoid using them for other tasks during the transfer. - 4
Or restore from iCloud backup
On the new iPhone, choose Restore from iCloud Backup, sign in with your Apple ID, and select the latest backup. Allow restoration to complete without interruption.
Tip: Ensure your iCloud backup is recent before starting. - 5
Or restore from Finder/iTunes backup
Connect the old iPhone to your computer, create a backup, then connect the new iPhone and restore from that backup. This method is offline and can be reliable for slow networks.
Tip: Use the latest Finder/iTunes version for compatibility. - 6
Verify sensitive data transfer
After the transfer, check messages, photos, contacts, and health data. Re-authenticate apps and services that require passwords or two-factor authentication.
Tip: Note any apps requiring re-login and prepare credentials in advance. - 7
Complete setup on the new device
Finish device setup, enable/disable features as desired, and set up Apple Pay and privacy controls. Download any missing apps and reconfigure widgets or home screen layout.
Tip: Install important apps first and test essential functions like calling and messaging. - 8
Clean up and decommission the old device
Sign out of iCloud if you’re wiping the old device. Remove the old device from your Apple ID to prevent data from syncing unexpectedly.
Tip: Back up the old device if you plan to keep it as a spare. - 9
Run a quick privacy check
Review app permissions, review location sharing, and recheck privacy settings to ensure your data is shared only as you intend.
Tip: Revisit screen time and app-tracking controls to maintain privacy. - 10
Completion and confirmation
Confirm that your most important data moved correctly and that accounts are accessible. If anything is missing, consider a secondary restore or targeted data sync.
Tip: Keep a backup of your new device as a safety net.
Got Questions?
What is the quickest way to transfer data between iPhones?
For most users, Quick Start offers the fastest transfer by moving data directly between devices. If you have limited time or data, this is usually the preferred method. You can also use an iCloud backup for a cloud-based transfer, though it may take longer depending on your internet speed.
Use Quick Start for the fastest transfer, or iCloud if you prefer a cloud-based option.
Do I need Wi-Fi to transfer data between iPhones?
Quick Start can work with a direct device-to-device connection and may not require a home Wi-Fi network, but iCloud restores and many app downloads do rely on internet access. If your data plan is limited, a wired Quick Start can also help avoid network constraints.
Yes, iCloud and app downloads require internet, while Quick Start can also work locally with a cable.
Will this transfer move messages and photos?
Yes, messages and photos are typically included in transfers when using Quick Start, iCloud backups, or Finder backups. Health data, contacts, and app data usually move too, but some apps may require re-authentication.
Most messages and photos transfer with the right method and backup.
What items are not transferred?
Some items like certain app data, passwords, and some secure data may require re-authentication. Password managers and two-factor authentication prompts will need you to sign back in on the new device.
Some app data and passwords may need re-login after the transfer.
How long does the transfer take?
Transfer duration depends on data size and method. Large libraries or many apps can take longer, while small data sets finish quickly. Avoid interrupting the process to minimize the chance of missing data.
It varies with data size; larger transfers take longer.
Do I need the old iPhone on during transfer?
Yes, the old iPhone should remain powered on and accessible during the transfer so data can be read and moved to the new device. Do not reset the old device during this period.
Keep the old iPhone on while the transfer completes.
Can I transfer from iPhone with a different iOS version?
Most methods require compatible iOS versions on both devices. Ensure both devices are updated to a recent iOS version to maximize compatibility and data integrity.
Keep both iPhones updated to compatible iOS versions.
What should I do if data is missing after transfer?
Recheck the backup integrity, retry the transfer with a different method if needed, and confirm that you signed into the correct Apple ID. If still missing, restore again from the latest backup.
If data is missing, retry the transfer from the latest backup.
Watch Video
What to Remember
- Choose the best transfer method for your data size and network.
- Back up before starting to protect your data.
- Verify critical data after the transfer and reauthenticate apps.
- Keep Apple ID security in mind during setup.