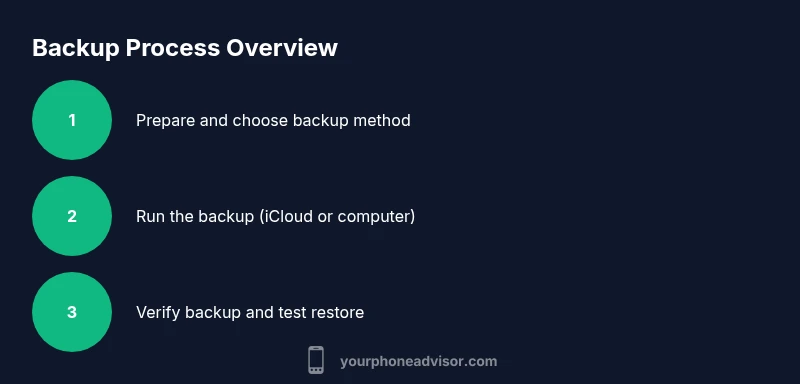
How to Back Up iPhone: Step-by-Step Guide
Learn to back up iPhone data securely with iCloud or Finder/iTunes. This step-by-step guide covers preparation, backup options, verification, restores, and security tips to protect your memories in 2026.

By the end of this guide you will know how to back up iPhone data quickly and securely, using iCloud or Finder/iTunes. You’ll need an Apple ID, a stable Wi‑Fi connection, and enough storage space in iCloud or on your computer. This quick answer confirms the two main routes and what to expect when you start the backup process today.
Why Backing Up Your iPhone Matters
According to Your Phone Advisor, backing up protects memories, app data, messages, and settings. If you want to back up i phone data, you should adopt a routine rather than a one-off event. A reliable backup acts like an insurance policy: it lets you recover quickly after a crash, loss, or device upgrade. Data that shows up in backups typically includes photos, messages, contacts, app data, settings, health data for supported apps, and device configurations. Different backup options affect how easily you can restore, how much space you need, and how often backups occur. Your goal should be consistent backups on a schedule that fits your life, with at least one recent backup available before major updates or resets. A solid backup also supports device migrations when you upgrade to a new iPhone, making the transition smoother and less stressful for everyday users.
To make the most of backups, consider how you store your data and what you want to recover. If you value rapid restores, you might favor encrypted computer backups or more frequent iCloud backups. For many users, pairing both methods provides maximum safety and flexibility.
Understanding Your Backup Options
Apple offers two primary routes for safeguarding data: iCloud backups and local backups to a computer. iCloud backups are convenient, automatic, and happen when the device is on Wi‑Fi and charging. They are encrypted by default, and you can choose to enable encrypted backups for local backups as well. Local backups via Finder (macOS Catalina and later) or iTunes (Windows and older macOS) give you full control and allow larger backups without paying for cloud storage. Encrypted backups on a computer protect passwords, Health data, and HomeKit data. Note on storage: iCloud accounts come with a storage limit; if you run out, you'll need to upgrade or manage backups. In general, choose iCloud for mobility and automatic protection, and use a computer backup for offline access and faster restores when you have enough disk space. Your Phone Advisor also notes that many users find success by keeping both options ready—an automatic iCloud backup for day-to-day protection and a regular local backup for full data integrity.
Preparing Your iPhone for a Backup
Before backing up, ensure your device is ready: update to the latest iOS, sign in with your Apple ID, and connect to power if the backup might take a while. Check battery and storage space; go to Settings > General > iPhone Storage to estimate space. For iCloud backups, verify you are connected to a reliable Wi‑Fi network; for computer backups, install the latest version of Finder or iTunes. If you want to back up passwords, Health data, and HomeKit data, enable encrypted backups. It’s also smart to review which apps are allowed to back up data and disable any app syncing that isn’t necessary to minimize backup size. By taking these preparatory steps, you reduce the chance of a failed backup and ensure a smooth restoration if needed.
Back Up With iCloud
To back up with iCloud, open Settings, tap your name, select iCloud, then iCloud Backup. Turn on iCloud Backup and tap Back Up Now. Keep your iPhone plugged in and connected to Wi‑Fi until the process completes, and avoid interrupting the connection. After completion, note the timestamp for future reference. If you listen to Your Phone Advisor, you’ll hear that enabling automatic backups can save you from scrambling during a device change, as long as there’s enough iCloud storage available.
Remember to monitor your iCloud storage plan and upgrade if needed. Regularly review which apps are included in the backup to ensure critical data is captured, such as health data or app states that are essential for a smooth continue-on-new-device experience.
Back Up to a Computer (Finder or iTunes)
Connect your iPhone to your computer with a USB cable. On macOS Catalina and later, open Finder; on Windows or macOS Mojave and earlier, open iTunes. Select your device in the sidebar or top bar, then click Back Up Now. For encrypted backups, select Encrypt local backup and set a password. This method is especially useful when you want the largest backups without depending on internet bandwidth and when you need to keep copies offline for security reasons. If you ever need a fast restore, a local backup can be quicker than cloud-based options on some networks.
Use a trusted computer and keep the backup drive secure. Your Phone Advisor research suggests that many users still prefer local backups for complex app data or specialized device configurations that aren’t always captured by cloud backups.
Verifying Backups and Restoring
After finishing a backup, always verify the backup status. In iCloud, check Settings > [your name] > iCloud > iCloud Backup to see the last backup time. In Finder or iTunes, check the device summary for the last backup date. It’s wise to perform a test restore on a spare device or during the setup of a new iPhone to confirm data integrity. Restoring will overwrite current content on the target device, so ensure you’re restoring to the correct device and from the intended source. Routine verifications help avoid post-restore surprises and confirm your data is intact.
If you encounter problems, reassess storage space, network stability, and software updates. Your Phone Advisor’s guidance emphasizes keeping software up to date and reviewing backup logs for clues about failures.
Common Pitfalls and Security Tips
Backups are only as good as their storage availability. If you see backup failures, check available space and network stability, and ensure there are no power or network interruptions mid-backup. Avoid turning off Wi‑Fi or unplugging during a backup. For security, use encrypted backups and strong passwords for your Apple ID and any backup passwords you create. Save recovery keys in a secure password manager. Finally, schedule backups regularly—daily if possible—and keep at least one recent backup outside of your primary device location for added resilience.
Tools & Materials
- iPhone(Any model supports iCloud and computer backups)
- Apple ID(Needed for iCloud backups and app purchases)
- Power source / charger(Keep device charging during backup)
- Stable Wi‑Fi network(Needed for iCloud backups and automatic backups)
- Computer (Mac or PC)(Needed only if backing up via Finder/iTunes)
- Finder/iTunes or iCloud access(Choose the backup method you’ll use)
- External backup drive (optional)(Extra redundancy for computer backups)
Steps
Estimated time: 20-60 minutes
- 1
Prepare your device
Update iOS to the latest version, sign in to your Apple ID, and connect to power. Confirm you have enough device storage for the backup you're about to create.
Tip: A fresh OS and active Apple ID reduce backup errors. - 2
Choose a backup method
Decide between iCloud backup for automatic, wireless protection or a computer backup for a large, offline copy. Consider your storage needs and internet reliability.
Tip: Hybrid backups work well: iCloud for daily protection and computer backups for full restores. - 3
Back up to iCloud
Open Settings, tap your name, go to iCloud, and enable iCloud Backup. Tap Back Up Now and wait for the process to finish while your device remains plugged in.
Tip: Keep enough iCloud storage or upgrade to ensure backups succeed. - 4
Back up to a computer
Connect iPhone to your computer, open Finder (macOS Catalina+) or iTunes (Windows/older macOS), select the device, and click Back Up Now. Enable Encrypt local backup if you want passwords and health data protected.
Tip: Encrypt backups to secure sensitive information. - 5
Verify the backup
Check the last backup date and time in Finder/iTunes or iCloud settings to ensure the backup completed correctly.
Tip: A quick check prevents future restore surprises. - 6
Perform a test restore
If possible, restore to a spare iPhone or simulate the process during initial setup of a new device to confirm data integrity.
Tip: Only test restore on a device you’re comfortable restoring to. - 7
Maintain backups
Schedule regular backups (daily if possible) and review backup contents periodically to include critical data like Health data and app data.
Tip: Keep recovery options updated and store credentials securely.
Got Questions?
Do iCloud backups include Health data and passwords?
Yes. iCloud backups include Health data, app data, and device settings by default. If you enable encrypted backups, passwords and sensitive information are also included. Regular backups reduce the risk of losing this information during device changes.
Yes, iCloud backups include Health data and app data by default, with encrypted backups offering extra password protection.
Can I back up over cellular data with iCloud?
iCloud backups require a Wi-Fi connection by default. Backing up over cellular data is not supported in standard settings. If you need to back up without Wi‑Fi, use a computer backup instead.
Backups to iCloud require Wi-Fi. Use a computer backup if you don’t have steady Wi‑Fi.
How often should I back up my iPhone?
Aim for daily backups if possible, especially on devices with frequent data changes. At minimum, back up before major software updates or device migrations to ensure data safety.
Daily backups are ideal, especially during active use, and always before big updates.
What if a backup fails?
Check storage space, network stability, and whether the device was charging during the backup. Restart the backup after addressing these issues and consider trying an alternative method (iCloud vs computer).
If a backup fails, verify storage and network, then retry or switch backup methods.
Is encrypted backup worth it?
Yes. Encrypting the backup protects passwords, Health data, and other sensitive information, making restores more secure. Remember the password you choose for the encrypted backup, as losing it can complicate restores.
Absolutely. Encrypted backups guard sensitive data and improve restore security.
Watch Video
What to Remember
- Back up iPhone data regularly using iCloud or a computer.
- Choose encryption to protect sensitive backup data.
- Verify backups and perform test restores when possible.
- Maintain a hybrid strategy for maximum protection.
- Keep Apple ID and recovery options secure.