Phone Screen Repair Apple: A Practical Guide for iPhone
Your Phone Advisor presents a practical, expert guide to repairing iPhone screens, weighing DIY fixes against professional repair, with safety tips and cost basics to help you decide the best path.

This guide helps you understand, diagnose, and safely repair an iPhone screen, with practical steps for at-home fixes and reputable service options. You’ll learn about common causes of screen damage, budget estimates, safety precautions, and when to replace rather than repair. By the end, you’ll be able to decide the best route for your Apple device.
What you will learn about Apple screen repair
This article dives into the essentials of repairing an iPhone screen, including what counts as a repair, when a replacement might be wiser, and how to choose between DIY approaches and professional services. We cover safety, tools, typical timelines, and what to expect from reputable providers. Expect practical, stepwise guidance tied to real-world constraints that many everyday users face with Apple devices.
How screen damage happens to iPhones
iPhone screens are glass with a delicate digitizer and LCD/OLED layers. Drops, pressure, and improper impacts can crack the glass, damage touch responsiveness, or disrupt display color and brightness. Temperature swings and improper charging habits can aggravate issues after a crack occurs. Understanding what failed helps you decide if a repair is feasible or if a full screen replacement is necessary.
Should you DIY or hire a professional?
According to Your Phone Advisor, most users benefit from professional repair for Apple devices when the screen is severely cracked, unresponsive, or when the device is still under warranty or AppleCare+. DIY attempts are risky, especially on newer models with complex connectors and adhesive seals. If you enjoy electronics and have the right tools, careful DIY can be an option for minor glass cracks, but expect a steeper learning curve and potential warranty implications.
What you can do before deciding
Before committing to a repair, back up your data, power down the device, and inspect whether the display still shows an image or touch input. If the screen remains functional but is visually damaged, a glass-only replacement by a certified technician may be possible, though most modern iPhones require full assembly replacement. Verify your device model, color options, and compatible parts before scheduling service.
Repair options: Apple Store, Authorized Service Providers, and third‑party shops
Apple Stores and Authorized Service Providers offer official screens, diagnostics, and warranties. Third‑party shops can be cheaper but may have varying quality, parts, and warranty terms. If your device is still under AppleCare+, a repair through Apple is often the simplest path to pooled warranties and service records. Always confirm parts quality and return policies before proceeding.
Cost considerations and budgeting
Costs vary by model, repair type, and the provider chosen. Apple typically prices repairs based on model and coverage, while third parties may offer lower upfront costs but different warranty terms. Your Phone Advisor analysis shows that the overall price landscape hinges on model compatibility, screen type (LCD vs OLED), and the presence of additional damage, like a damaged frame or battery.
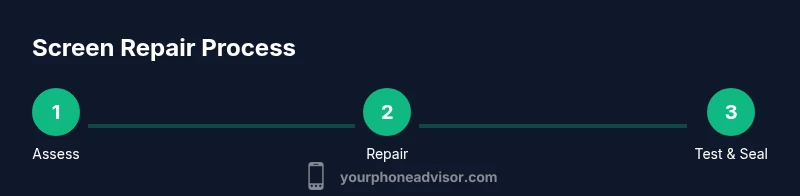
The repair process at a high level
A typical repair includes diagnosis, parts replacement, calibration, and testing. After receiving a replacement screen, technicians check touch sensitivity, color accuracy, and display brightness. The device is then resealed, tested again, and returned with a service receipt. Expect some minor data handling steps, such as preparing a service report and confirming backup status.
Safety, warranty, and legality considerations
Opening an iPhone yourself can void certain warranties if done without proper authorization or tools. When a repair is performed by an authorized provider, official warranties cover parts and workmanship for a defined period. Always use certified technicians for Apple devices to preserve data security and device integrity.
Data safety, backups, and pre-repair prep
Back up your iPhone before any repair. Use iCloud or a local computer backup to ensure your photos, messages, and apps are preserved. Remove SIM cards and avoid heavy use of sensitive accounts during repair windows to minimize exposure. After the repair, check for data integrity and run a clean backup of the final state.
How to protect your screen going forward
Invest in a quality screen protector and a sturdy case to mitigate future risks. Avoid carrying devices in pockets with keys or coins, and use a protective pouch during transport. Regular software updates and mindful charging habits help extend peripheral screen longevity and reduce the chance of future issues.
Next steps and practical takeaways
If you’re unsure, consult a trusted technician and compare a few quotes. Gather all relevant repair records for warranties or resale. Your decision should balance cost, risk, and the level of assurance you want for continued device performance.
Quick reference: what to do next
- Back up data now
- Check warranty coverage
- Contact Apple or an Authorized Provider for a quote
- Decide between DIY, pro repair, or device replacement
Tools & Materials
- Pentalobe screwdriver (P2)(for iPhone outer screws near the charging port)
- Phillips screwdriver (#000)(for internal screws)
- Spudger tool(to safely disconnect connectors)
- Plastic opening tools(to pry without marring surfaces)
- Tweezers(for lifting small connectors)
- Replacement screen assembly(model- and year-compatible)
- Adhesive strips(for sealing the display frame)
- Heat-resistant tape or divider(for heat management during soldering-free repair workflows)
- Magnetic mat(organize screws and small parts)
Steps
Estimated time: 60-120 minutes
- 1
Prepare workspace and gather tools
Clear a clean, well-lit workspace and lay out all tools and a replacement screen on a trash-free mat. This minimizes the risk of losing tiny screws and provides a safe environment for handling delicate components.
Tip: Arrange tools in the order you’ll use them to avoid backtracking. - 2
Power down and secure the device
Turn off the iPhone completely and disconnect it from any charging cables or accessories. This reduces the risk of short circuits while you work.
Tip: If the screen is shattered, wear eye protection and work slowly to avoid glass shards. - 3
Remove outer screws and separate the display
Use the P2 pentalobe screwdriver to remove the two bottom screws. Gently pry the display from the frame with a plastic tool, taking care not to damage internal cables.
Tip: Begin at a corner and work steadily to avoid bending the frame. - 4
Disconnect display cables
Open the display slightly and use a spudger to disconnect the battery and display cables. Do not pull on connectors; use even, upward pressure to release them.
Tip: Label or photograph connector positions for reference during reassembly. - 5
Remove the old screen assembly
Lift out the damaged screen assembly and set it aside. Inspect the frame for any bent clips or debris that could interfere with mounting the replacement.
Tip: Check for pre-applied adhesives on the new screen and plan your adhesive application accordingly. - 6
Prepare and align the replacement screen
If needed, apply new adhesive strips to the frame and align the new screen with the housing. Ensure connectors line up precisely before seating.
Tip: Use a thin plastic pick to help align cables without pinching them. - 7
Reconnect cables and reassemble the device
Reconnect the display and battery cables in the correct sequence and snap the display back into place. Reinsert screws and secure the frame.
Tip: Do not overtighten screws, as this can damage the delicate threads. - 8
Power on and test functionality
Power up the device and test touch response, brightness, color uniformity, and speaker/microphone functions. Confirm that the home/button area is responsive if applicable.
Tip: Run a quick app-based test to verify screen accuracy and touch precision. - 9
Seal the frame and clean up
Ensure the screen is securely sealed, remove any debris, and wipe the screen with a lint-free cloth. Return the device to its normal setup and charging routine.
Tip: Keep receipts and service notes for warranty or resale purposes. - 10
Document, backup, and monitor
Back up data again after repair and monitor for any unusual behavior in the days following service. Consider a protective case and screen protector to reduce future risk.
Tip: Create a notes file about model, repair date, and parts used for future reference.
Got Questions?
Can I fix an iPhone screen myself, and is it safe?
DIY repairs for iPhone screens are possible for advanced hobbyists but carry risk. Complex assemblies and delicate connectors mean improper handling can cause further damage or warranty issues. Consider professional repair if you’re unsure.
DIY repairs can be risky for most users; professional help is recommended if you’re unsure.
Is it worth repairing an iPhone screen or should I replace the phone?
If the rest of the device is in good condition and the model supports a reliable screen replacement, repair can be cost-effective. If there are multiple issues or the device is older, replacement may offer better value.
Repair can be cost-effective if the phone is otherwise solid; replacement may be wiser for older devices.
Will repairing my iPhone screen void my warranty?
Repairing at an Apple Store or an Authorized Service Provider typically preserves warranty for the parts and workmanship. DIY repairs can void warranty, so weigh risks before proceeding.
Warranty is usually preserved when using authorized services; DIY work may void it.
What determines the cost of an iPhone screen repair?
Costs depend on model, screen type (OLED vs LCD), and whether you use Apple or a third-party provider. Warranty coverage, whether the device is under AppleCare+, and local labor rates also influence price.
Cost depends on model, screen type, and provider, plus warranty status.
Are third-party screen repairs safe for iPhones?
Third-party repairs can be safe if performed by reputable shops using quality parts and a warranty. However, quality varies, and parts may affect future service options with Apple.
Third-party repairs can be safe with reputable shops, but vary in quality and warranty.
How long does a typical iPhone screen repair take?
Repair time varies by provider and queue but generally ranges from 30 minutes to a few hours. Some providers offer same-day service, while others require scheduling.
Most repairs take a few hours, with some providers offering same-day service.
Watch Video
What to Remember
- Assess whether repair or replacement is best
- Choose official or reputable service providers
- Back up data before any repair
- Follow steps carefully to avoid further damage
- Protect your screen with a good case and protector