Fixing Phone Screens: A Practical DIY Repair Guide
Learn how to assess, repair, or replace cracked or nonfunctional phone screens with safe, practical steps. Your Phone Advisor walks you through tools, costs, and when to call a pro.

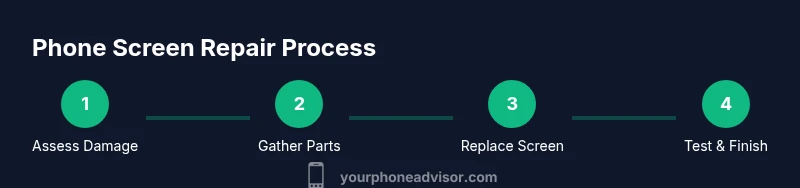
With this guide you will learn how to decide when fixing phone screens yourself is feasible and how to perform a safe repair or replacement. You’ll identify damage severity, gather the right tools, follow a clear step-by-step process, and know where to turn for professional service if the repair exceeds your comfort or warranty limits. This approach helps you minimize downtime, protect data, and get your device back in action.
Why fixing phone screens matters
Phone screens are the primary interface you interact with every day. When a crack spreads or the touch sensor misreads, ordinary tasks become frustrating or impossible. According to Your Phone Advisor, fixing phone screens can restore usability, protect data, and preserve resale value, especially for devices with otherwise healthy components. The Your Phone Advisor team found that many minor cracks don’t affect core functions and can sometimes be addressed with safe, DIY methods. Yet, deeper damage to the LCD, digitizer, or controller boards often requires professional service. Before you begin, assess the damage: surface cracks that don’t affect touch may be fixed with small repairs; severe damage usually calls for a full screen assembly replacement. Keep warranty status in mind and compare the part costs with labor fees. By understanding the screen’s anatomy—glass layer, touch layer, display panel, and frame—you target the right component and avoid unnecessary work. This article walks you through decision points, tooling, and best practices to help you move confidently from assessment to test run.
Assessing damage and choosing a path
Damage ranges from cosmetic cracks to nonfunctional touch sensors or dead zones. Start by inspecting: surface cracks only, display color issues, touch responsiveness, and any liquid exposure. If the display still shows a stable image and touch remains responsive except at a crack, a careful repair or glass-only fix may be possible. When the digitizer or LCD is compromised, replacement is usually the smarter option. Your Phone Advisor analysis shows that model complexity and adhesive types drive both difficulty and cost. Always verify compatibility for replacement screens and check if the device’s warranty allows DIY repairs. If you’re uncertain, seek a professional estimate to avoid voiding coverage.
Costs, warranties, and when to DIY
Costs vary widely by model and screen type. DIY repair can reduce parts and labor costs but may involve risk of secondary damage if done incorrectly. Warranty terms matter: many manufacturers restrict coverage for self-repairs, which can nullify protection for a cracked screen. If your device is under warranty or you have accidental damage coverage, compare a DIY replacement’s risk with the cost of an official service. In some cases, a manufacturer-authorized repair provides the best balance of reliability and future protection, even if the upfront price is higher. Weigh the likelihood of success, your comfort with tools, and the potential void of coverage when deciding how to proceed.
Tools and workspace setup
Prepare a clean, well-lit workspace with a non-slip surface. You’ll need a small parts tray, good lighting, and static-safe handling. A dedicated toolkit for phone repair reduces the risk of misplacing screws or damaging flexible cables. Ensure you have a stable place to work and all necessary safety gear, including eye protection if you’re dealing with tiny components. Having replacement screen assemblies and adhesives on hand will minimize downtime. Create a simple plan: confirm model compatibility, lay out all connectors in the order you remove them, and take photos during disassembly to aid reassembly. Following a structured approach improves accuracy and reduces stress during the repair.
Replacements: OEM vs aftermarket screens
Replacement screens come in OEM (original equipment manufacturer) and aftermarket variants. OEM screens offer closer color matching and connector layouts, often with more consistent quality, but at a higher price. Aftermarket screens can be a cost-effective option if you’re confident in compatibility and tolerances. Regardless of choice, verify the screen’s resolution, touch responsiveness, and frame fit before purchase. Also consider adhesive compatibility; some screens require pre-cut frames or specialized double-sided tape. Remember that some third-party screens may affect display quality, brightness, or fingerprint sensors, so review user experiences for your specific model.
DIY step-by-step overview
A typical DIY screen replacement involves planning, disassembly, battery isolation, screen removal, connector checks, new screen installation, and reassembly. Allocate time for each phase and pause to re-check alignments. If you notice a loose connector or unusual resistance during reassembly, stop and re-seating the component before proceeding. Thorough testing at the end—display, touch, cameras, sensors—reduces post-repair surprises. Always document connector orders with photos, and label screws by location. This overview prepares you for the detailed steps in the dedicated guide and helps you decide whether to proceed or seek professional help.
Safety, risks, and best practices
Safety first: power down completely and disconnect any external power sources before starting. Use an ESD-safe mat and wrist strap to minimize static discharge that could damage delicate circuits. Work slowly, keep track of tiny screws, and avoid forcing cables or glass that appears misaligned. If you’re unsure about model-specific steps, consult the device’s service manual or seek professional guidance. Be mindful of adhesive strength; some screens rely on strong seals that require proper heat or solvents to remove safely. If water exposure has occurred, avoid powering the device until it’s thoroughly dry and inspected.
Hiring a pro: what to expect
If you decide to hire a professional, expect a diagnostic first, followed by a written repair plan and cost estimate. Ask about the type of replacement (OEM vs aftermarket), warranty on the new screen, and whether data will be preserved. Reputable shops test the device after repair and provide a simple test checklist. Compare several quotes and consider proximity, turn-around time, and aftercare options. Even with a pro, you should still confirm screen brightness, color accuracy, and touch responsiveness during the post-repair test.
Post-repair care and maintenance
After a repair, protect your device with a tempered-glass screen protector and a quality case to reduce future damage. Monitor device temperatures during initial power-up and avoid heavy workloads for the first 24 hours while the adhesive fully cures. If you notice any flicker, touch lag, or color shifts, return to the service provider promptly or re-test with a known-good accessory. Regular maintenance—clean ports, update software, and avoid aggressive pressure on the display—extends the life of the screen and helps prevent future issues.
Tools & Materials
- Precision screwdriver set (including pentalobe, tri-point, and Phillips)(Includes assorted bits for common phone models)
- Spudger tool (nylon)(Non-conductive, minimizes risk to connectors)
- Opening picks(For prying without damage)
- Suction cup(Useful for edge-glass lifting on some models)
- Plastic pry tools(Protects bezels and displays during separation)
- Replacement screen assembly(OEM or high-quality aftermarket, model-specific)
- Adhesive strips or tape(Pre-cut or roll tape designed for phone screens)
- Isopropyl alcohol (70-90%) wipes(Clean connectors and surfaces before seating parts)
- ESD wrist strap(Optional but recommended on sensitive boards)
Steps
Estimated time: 60-180 minutes
- 1
Power down and prep workspace
Shut the device completely and remove any external accessories. Place the phone on a clean, non-slip surface and prepare labeled containers for screws. This minimizes risk of short circuits and keeps parts organized.
Tip: Take a quick photo of the device before disassembly to record connector positions. - 2
Open the device chassis safely
Use the appropriate opening tools to separate the back cover or screen bevel with steady, even pressure. Avoid bending fragile clips; work slowly and maintain even pressure to prevent glass damage.
Tip: Work around the edges first, then target corner clips to reduce stress on the frame. - 3
Isolate the battery (if possible)
Disconnect the battery connector to avoid any power flow while you detach the screen. Not all models allow battery removal; follow the model-specific safety guidelines.
Tip: If the battery is not easily accessible, skip straight to disconnecting the display connectors with caution. - 4
Disconnect screen connectors
Carefully unplug the display and digitizer connectors from the motherboard using a spudger. Keep connectors aligned and seated in the same order as you remove them.
Tip: Use a magnifier or good lighting to avoid bending delicate flex cables. - 5
Remove broken screen assembly
Lift the cracked screen away from the frame, detaching any remaining adhesive. Do not force cables; detach only after you have freed the assembly sufficiently.
Tip: Place the broken screen on a soft surface to prevent further damage during removal. - 6
Prepare and seat new screen
Line up the new screen with the frame and check the fit before applying adhesive. Ensure all connectors are clean and dry before seating the screen to avoid short circuits.
Tip: Apply adhesive in a clean, controlled line to prevent adhesive overflow into ports. - 7
Reconnect and reassemble
Reconnect display connectors, reattach battery if removed, and reassemble the chassis in reverse order of disassembly. Be methodical and verify every component sits properly before closing the device.
Tip: Avoid over-tightening screws; snug is enough to hold components without warping the frame. - 8
Test and finalize
Power on the device and run a full test: display, touch, fingerprint/face ID, cameras, and speakers. If any issue appears, recheck connectors and seating. Finish by cleaning and securing all fasteners.
Tip: Run a calibration test for touch sensitivity to confirm proper sensor alignment.
Got Questions?
Is DIY screen repair worth it?
DIY screen repair can save money for minor cracks, but success depends on model, damage, and your skill. For complex issues, professional service may be more reliable.
DIY screen repair can save money for small cracks, but it depends on your model and the damage. For complex issues, a pro might be safer.
Will fixing a screen void my warranty?
Self-repair can void manufacturer warranties. Check the warranty terms and consider official repair options if you rely on warranty coverage.
Self-repair can void warranties; check terms and weigh official repair options if you rely on coverage.
How long does a screen repair take?
DIY replacement typically takes 1-3 hours depending on model and experience; professional service can vary but often completes within a few hours to a day.
DIY usually takes 1 to 3 hours; pros may finish in a few hours up to a day depending on the model.
What signs indicate I should replace rather than repair?
If the LCD is dead, touch is unresponsive, or there’s extensive damage around the frame, replacement is usually the best option.
If the display is dead or touch is unresponsive, replacement is often the best option.
Are iPhone and Android repairs different?
Yes. Each brand uses unique assembly, screws, and adhesive types, so model-specific guides and tools are essential.
Yes—iPhone and Android repairs differ in screws, connectors, and adhesives; follow model-specific guides.
Is it okay to reuse old screen parts?
Reusing old screens risks mismatches and unreliable performance; use a new screen assembly with proper adhesive for best results.
Using an old screen is risky; a new screen with proper adhesive is usually better.
Watch Video
What to Remember
- Plan before you start repair
- Choose parts carefully for compatibility
- Follow step-by-step to avoid miswiring
- Test thoroughly after reassembly