Cell Phone Screen Fix: A Practical DIY Repair Guide
Learn safe, practical steps to fix a cracked or unresponsive phone screen, compare DIY vs professional repair, and protect your investment with expert guidance from Your Phone Advisor.

Goal: fix a cracked or unresponsive cell phone screen by choosing between a DIY repair and professional service, then following a careful, stepwise process. Assess damage, gather the right tools, and understand safety risks and costs. According to Your Phone Advisor, begin with minor cracks or touchscreen issues and plan a replacement if the repair costs exceed a reasonable threshold.
Understanding screen damage types
Smartphone screens can fail in several distinct ways, and recognizing the exact issue helps you choose the right fix. Minor surface cracks and scratches affect aesthetics but not function. Micro-cracks along the edges may spread with flexing and heat, eventually causing digitizer faults. A shattered display with dead zones often indicates a damaged LCD or OLED panel, sometimes accompanied by digitizer failure where touch input becomes unreliable. In some cases, the glass cracks while the underlying display remains functional; in others, both layers fail, making repair essential. When assessing damage, check touch responsiveness, color accuracy, brightness uniformity, and the visible presence of gaps or lift around the display. This initial diagnosis informs whether a DIY screen replacement is feasible or if a professional repair is the safer path.
Why it matters
Knowing the damage type helps you estimate cost, determine risk to the battery, and decide if the device is worth repair. A cracked screen that still registers touches may be a candidate for a glass-only fix if the digitizer is intact, whereas a non-responsive screen likely requires a full display assembly replacement. Your Phone Advisor emphasizes starting with a conservative assessment to avoid compounding damage during teardown. If you’re unsure at any point, err on the side of professional service to protect data and safety.
Typical indicators of a repair path
Consider compatibility and repair viability before buying parts. If your model uses a fixed battery or has a modular screen with fragile connectors, a professional repair may preserve warranty status and ensure proper sealing against dust and moisture. Conversely, older devices with removable batteries and loose tolerances can be more forgiving for a DIY approach, provided you have the right tools and a clean workspace.
Tools & Materials
- Replacement display assembly (OEM or high-quality third-party)(Match model number; ensure LCD and digitizer compatibility)
- Precision Philips screwdriver (e.g., #000, #00)(Small head for tight screws around the frame)
- Pentalobe or Torx driver (where applicable)(Check your device model's security screws)
- Opening picks and nylon/soft pry tools(Plastic to avoid motherboard or frame damage)
- Suction cup(Helpful for lifting glass without shattering it)
- Tweezers(Fine-point for cable connectors)
- Isopropyl alcohol (99%) and lint-free wipes(For cleaning adhesive residue and connectors)
- Adhesive strips or frame sealant(Helps re-seal the display and keep dust out)
- Microfiber cloth(Avoid lint on the screen surface)
- ESD wrist strap or mat(Prevent static damage to sensitive components)
- Heat source (hair dryer or heat gun, low setting)(Loosen adhesives gently; avoid overheating)
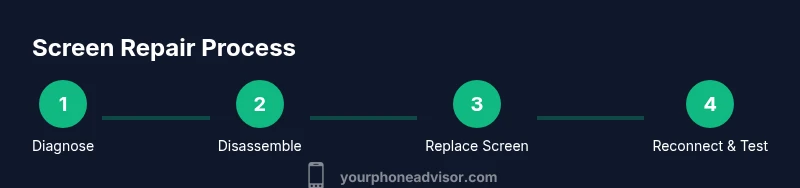
Steps
Estimated time: 60-120 minutes
- 1
Power down and prep
Power off the device completely and disconnect any accessories. If your model has a removable battery, detach it using appropriate tools. This step minimizes the risk of short circuits and protects your data.
Tip: Work on a static-free surface; keep screws organized by size and location. - 2
Open the device safely
Apply gentle heat to the screen edges if needed, then use suction and plastic picks to separate the glass from the frame. Avoid prying too aggressively to prevent flexing cables from tearing.
Tip: Keep track of adhesive tabs and note their original orientation for reassembly. - 3
Disconnect the display assembly
Carefully locate and disconnect the display data and power cables. Use fine-tipped tweezers and a spudger to lift connectors without bending pins. Stop if you see resistance or a damaged flex.
Tip: Take photos during disassembly to guide reassembly. - 4
Remove the broken screen
Lift the broken screen away from the chassis, ensuring you don’t damage the backlight layer or front camera. Remove any remaining glass fragments with care and dispose of them safely.
Tip: Wear eye protection to guard against sharp shards. - 5
Install the new screen
Align the new display with the frame and reconnect all cables. Use new adhesive, position the bezels correctly, and avoid flexing connectors during seating.
Tip: Double-check the cable routing to prevent pinching. - 6
Reassemble and test
Reassemble the device, power it on, and test display quality, touch response, brightness, and color accuracy. If issues appear, re-check connections and reseat cables as needed.
Tip: Test before final sealing; confirm all functions work before closing fully.
Got Questions?
Is DIY screen repair worth it for a modern smartphone?
DIY screen repair can be cost-effective for older models or minor cracks, but modern devices with glued screens and fragile cables increase risk. If you’re unsure about the model or lack proper tools, professional service is safer and may preserve warranty.
DIY repair can save money on older models, but for newer devices, professional repair is often safer and can protect warranties.
Can I replace just the glass if the touchscreen still works?
Some devices allow glass-only repairs when the digitizer remains functional, but many modern screens are a single assembly. Verify model-specific guidance and consider the risk of delamination or invisible cracks.
Glass-only fixes are possible on some models, but often the display and digitizer are one unit.
Will repairing my screen void my warranty?
Opening a device can affect warranty coverage. Some manufacturers allow third-party repairs under certain conditions, but always check terms and keep records of the service.
Warranty may be affected by DIY repairs—check terms and keep repair receipts.
What’s the typical cost range for a screen replacement?
Repair costs vary by model and region. Generic ranges exist, with higher-end devices typically costing more. Compare quotes from authorized service centers and reputable repair shops.
Repair costs depend on model; get quotes and compare options.
How long does a screen repair usually take?
A typical screen replacement can take 60 to 120 minutes at a shop, longer if parts need ordering or if the device requires additional diagnosis.
Most screen repairs take about one to two hours in a shop.
When should I replace instead of fix my phone?
If the device is significantly older, has battery health issues, or repair costs approach or exceed the device’s value, replacement may be the wiser choice.
If repair costs near device value, replacement is often the better option.
Watch Video
What to Remember
- Assess damage type before buying parts
- DIY repair can save money on older devices
- Professional repair offers warranty and safer handling for complex models
- Use the right tools and safety practices to avoid battery and connector damage
- Test thoroughly before sealing the device