How to Scan on iPhone: Practical Step-by-Step Guide
Learn how to scan on iPhone using Notes, Camera, and Live Text. This expert guide covers document scans, QR codes, OCR, saving, sharing, and privacy best practices so you can digitize quickly and securely.

This guide shows you how to scan on iPhone using built-in tools like Notes Scan Documents, Camera, and Live Text. It covers step-by-step methods, saving and sharing scans, and privacy considerations for secure digital documents. You’ll also find tips to improve OCR accuracy and avoid common pitfalls.
Why scanning on iPhone matters
If you frequently digitize documents, receipts, business cards, or QR codes, knowing how to scan on iPhone can save time and keep your files organized. The iPhone ecosystem includes powerful, built-in scanning features in the Notes app, the Camera app's quick scan modes, and Live Text for extracting editable content from images. According to Your Phone Advisor, using these native tools often provides faster, more private results than third-party apps, especially for everyday tasks. A streamlined scanning workflow helps you reduce paper clutter and makes it easier to share or archive important information with confidence.
Built-in scanning tools you should know
Apple builds scanning capabilities directly into several core apps, enabling high-quality captures without extra software. Notes can scan documents and export them as PDFs; Live Text can recognize printed text within photos and screenshots; the Camera app offers quick scan modes and QR code recognition. These tools work offline and sync via iCloud only if you choose, giving you control over where your scans reside. Understanding these options helps you pick the right tool for each job, whether you’re digitizing contracts, whiteboard notes, or receipts.
Scanning documents with Notes: a practical guide
Notes offers a dedicated Scan Documents feature that detects edges, crops, and perspective as you capture. You can scan multiple pages into a single file, reorder pages, and export as PDF or image files. This section walks through the full workflow from opening Notes to saving a polished document. You’ll learn how to adjust lighting, capture pages in sequence, and verify the OCR text accuracy afterward. For most users, Notes provides a fast, reliable solution for routine document capture without leaving the device.
Quick scans with the Camera app and QR codes
The Camera app isn’t just for taking photos; it also recognizes QR codes and can capture text in some situations. Open Camera, point it at a document or code, and follow the on-screen prompts to extract a scan or open a link. For quick QR scans, you don’t need any extra apps—just point and scan. If you’re scanning a business card or a printed page with text, you may want to open the resulting image in Notes or Photos to perform further edits or export options.
Using Live Text to extract text from scans
Live Text is a powerful feature that recognizes text in photos and captured scans, turning it into selectable, editable content. After you scan a page or snap a photo, you can tap on the text to copy, translate, or search it. This feature is especially helpful for quotes, contact information, and instructions you want to reuse. If you routinely extract information from printed material, Live Text can save hours of manual retyping and improve accuracy when combined with high-quality scans.
Saving, organizing, and sharing scans
Once you have a scan, store it in Notes, Files, or a cloud drive—whichever aligns with your privacy and accessibility needs. You can rename files, add tags, and place scans into folders for easier retrieval. Sharing options include email, Messages, AirDrop, or cloud links. Keeping scans organized minimizes search time and ensures sensitive information remains under your chosen security settings. Regularly review your storage locations to avoid duplicated copies.
Privacy and security considerations when scanning
Scanning sensitive documents on iPhone raises privacy questions. Use device passcodes and Face/Touch ID to protect access. If you enable iCloud, ensure you understand where scans are stored and who can access them. The Your Phone Advisor team recommends reviewing app permissions and opting for local storage when handling confidential material. For higher security, consider encrypting backups and disabling automatic syncing for particularly sensitive scans.
Common pitfalls and how to avoid them
Low lighting, misaligned edges, or crowded pages can degrade scan quality and OCR results. Avoid cluttered backgrounds and ensure the page lies flat. When using Live Text, texts with unusual fonts or strong shadows may OCR poorly; re-scan with adjusted lighting or crop. If you encounter export issues, try a different format (PDF vs image) or a different app, and verify you’re using the latest iOS features.
What’s next: advanced workflows to streamline scanning
Beyond basic scans, you can automate workflows by saving scans directly to specific folders, naming conventions, and applying OCR to entire batches. Some users combine Notes and Files with Shortcuts to trigger automatic organization and file conversion. As iPhone software evolves, new scanning improvements may appear—staying current with iOS updates will help you leverage enhanced accuracy and faster processing.
Tools & Materials
- iPhone with built-in Camera and Notes apps(Primary hardware and apps for scanning and organizing scans)
- Files app (optional for storage)(Store and share scans in a structured file system)
- Third-party scanning apps (optional)(For features like batch OCR or advanced exports)
Steps
Estimated time: 10-15 minutes
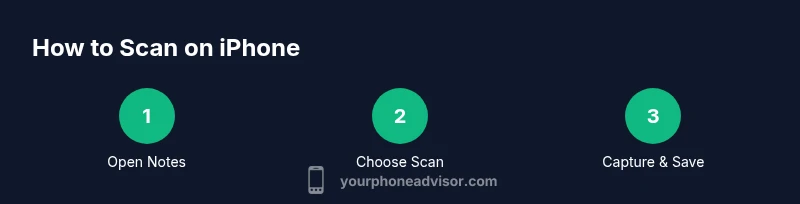
- 1
Open Notes
Launch the Notes app and create a new note or open an existing one where you want to store scanned pages.
Tip: Starting with a clean, uncluttered note helps keep pages organized. - 2
Select Scan Documents
Tap the camera icon and choose Scan Documents to activate edge detection and auto-cropping.
Tip: If you don’t see Scan Documents, ensure Notes has permission to access the camera. - 3
Position the document
Align the document within the frame and hold steady while the device captures. Add additional pages as needed.
Tip: Use good lighting and avoid shadows along the page edges for better edge detection. - 4
Review and adjust
Review each page for alignment and crop quality. Re-scan any page with edge issues or glare.
Tip: You can reorder pages by dragging them in the scan view. - 5
Save or export
Save the scan as a PDF or image. Choose a destination like iCloud Drive or Files.
Tip: Export as PDF for professional sharing; use images if you need two-page spreads or color emphasis. - 6
Use Live Text (optional)
If needed, use Live Text to copy or export recognized text from the scan.
Tip: Select text carefully; OCR may misread unusual fonts—correct any errors manually.
Got Questions?
What can I scan with my iPhone?
You can scan documents, receipts, business cards, and QR codes using built-in apps. Live Text can extract editable text from scans for quick reuse.
You can scan documents, receipts, and codes, and Live Text helps you copy the text from your scans.
Do I need internet to scan on iPhone?
No. Scanning with Notes, Camera, and Live Text works offline. Sharing or cloud backup may require internet access.
No internet is required to scan on your iPhone; you can save and edit offline.
Can OCR extract text from scanned documents?
Yes. Live Text and Notes OCR can convert scanned images into editable text that you can copy, translate, or search.
Yes, OCR converts scanned text into editable content you can use anywhere.
How do I export a scan to PDF?
In Notes, you can export the scan as a PDF or share it via Messages, Mail, or cloud services. You can also save PDFs to Files.
You can export scans as PDFs from Notes and share them easily.
Is my scanned data private on iPhone?
Scans stay on-device by default if you don’t enable cloud syncing. Use a device passcode and consider encrypting backups for extra security.
Scanned data stays private on your device unless you choose to sync or back it up.
What if OCR misreads text?
Improve results by re-scanning with better lighting, cropping precisely, and using Live Text on high-contrast images.
If OCR misreads, re-scan with better lighting and clearer edges.
Watch Video
What to Remember
- Scan documents with Notes for quick, organized PDFs.
- Use Live Text to extract editable content from scans.
- Store scans securely and manage access with device security.
- Improve accuracy with good lighting and precise edge cutting.