How to Put a New Phone Number in Your Phone
Learn how to add or change a phone number on iPhone or Android with a step-by-step approach. This guide covers SIM/eSIM updates, contacts, apps, and verification to keep you connected securely.

You’ll learn how to add or update a phone number on your device, whether you’re keeping your existing SIM or switching to a new one. The key requirements are a compatible phone (iOS or Android), access to your contact list or messaging apps, and the number you want to save. By the end, you’ll know exactly where to enter the new number and how to verify it.
Why updating a phone number matters
Keeping your phone number current is essential for reliable communication and account security. When you change numbers, missable calls, failed text deliveries, and two-factor verification problems can happen if you don’t update the data across your phone and services. This guide explains how to put a new phone number in your phone, whether you’re sticking with your current SIM, moving to an eSIM, or updating linked apps and accounts. According to Your Phone Advisor, taking a deliberate, well-documented approach reduces downstream hassles and preserves access to critical services. You’ll learn how numbers are stored on iOS and Android devices, how to verify ownership, and how to avoid common missteps. The process is straightforward, but a small preparation step can save you time and aggravation later. Your Phone Advisor team also notes that many users underestimate how many places a single number lives when it’s used for login and recovery.
Assessing your options: SIM, eSIM, or digital number
Before you start, decide how the new number will be carried on your device. If you’re not changing your SIM, you may simply update the number in the phone’s settings and in relevant apps. If you’re moving to an eSIM, you’ll activate a digital profile tied to the new number, which can be faster and more flexible. Physical SIM swaps may require a trip to your carrier or scanning a QR code provided by the carrier. Digital changes, like porting a number or updating a virtual profile, are common for many users who want to keep their current device while changing carriers or plans. This decision affects where you’ll edit the number later and how verification codes are delivered.
How numbers are stored on iPhone vs Android
On iPhone, the number associated with your device can be stored in several places: the system settings, your iCloud contacts, and the account settings used for services like iMessage and FaceTime. Android devices typically store the active number in the SIM/eSIM configuration, but Google accounts and messaging apps may also reflect the number you use for authentication. Understanding where the number lives helps you avoid duplicate entries and ensures you receive calls and texts correctly. In some cases, you’ll need to toggle a switch in the carrier settings to reflect a new profile.
Prerequisites before you begin
Gather what you’ll need so the process goes smoothly: a charged phone, the new number you want to store, access to your carrier account (or the carrier app), and a stable internet connection. If you’re adding a number through a SIM swap, have the new SIM card ready or an activated eSIM profile provided by your carrier. It’s also wise to back up important data, such as contacts, to avoid losing information during the change. Finally, ensure you know how you’ll verify ownership, since many services prompt a verification code via SMS or call.
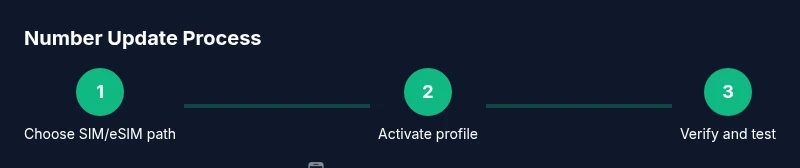
Step 1: Prepare your prerequisites and plan
Start by confirming whether you’ll update the existing SIM/eSIM or switch to a new one. Write down the exact number and note any required credentials for your carrier account. Prepare a quick checklist of apps that use your number for authentication (banking, messaging, social networks) so you can update them later. When you plan ahead, you reduce the risk of locked accounts or missed verifications. Pro tip: Have a backup contact method ready in case you need to confirm your identity.
Step 2: Activate a SIM swap or enable an eSIM
If you’re swapping physical SIM cards, power off the device, open the SIM tray, insert the new card, and power the device back on. For eSIM activation, scan the QR code provided by your carrier or enter the activation details in the carrier app. In some setups, you may need to deactivate the old profile and download the new one. After activation, verify that the device shows the new number or profile in the system settings. Tip: If you see “No SIM” after insertion, reseat the card or restart the phone.
Step 3: Update the number in system settings (core storage)
Navigate to Settings > Phone > My Number (iOS) or Settings > Network & Internet > Mobile Network (Android). Update the stored number and ensure it matches the one you intend to use. Some devices automatically populate this field from the SIM or carrier data; if so, you may need to override it manually. This step ensures that the device’s call and text routing reflects your new number. Pro tip: After saving, reboot the device to ensure changes take effect across services.
Step 4: Save the number to contacts and essential apps
If you want the new number accessible quickly, add it to your Contacts with a clear label (e.g., “Primary”) and link it to your favorites. Review apps that rely on your phone number for authentication, like banking, email, and social networks, and update the number there too. This prevents you from getting locked out if a verification code is sent to the old number. Note: Some apps will prompt you to verify after the update.
Step 5: Verify ownership and test functionality
Send a verification code to the new number or receive a call to confirm ownership, following prompts from your carrier and apps. Make a test call and a test text to ensure the new number routes correctly. Also test two-factor authentication flows that rely on the new number. If any service fails to verify, recheck the number entry, carrier settings, and app permissions. Pro tip: Keep the old number accessible during verification in case you need to re-run a code.
Step 6: Update linked services and security settings
Update services that use your number for recovery or login, such as email accounts, banking apps, and social networks. Review notification preferences and two-factor options, and switch to your new number where appropriate. If you use number-based security questions, update those answers as needed. Ensuring consistency across services reduces the risk of account lockouts and missed alerts.
Step 7: Troubleshooting common issues
If text messages aren’t delivering, check your carrier balance, profile activation status, and roaming settings. If calls fail, ensure the number is active on the carrier network and that you haven’t enabled call blocking for the new line. For eSIM issues, re-scan the QR or re-enter activation data, and contact your carrier if the profile doesn’t download correctly.
Step 8: Best practices and a quick-start checklist
Keep a simple checklist for future changes: confirm the number, activate the profile, update system settings, refresh essential apps, verify ownership, and test all services. Maintain a backup contact method and periodically review security settings related to your number. This conservative approach minimizes downtime and keeps you reachable across devices.
stepByStepFooterNotePartThereIsNoFooter
Tools & Materials
- Smartphone (iOS or Android)(Ensure OS is up to date and device is unlocked)
- New phone number(The number you want to store or activate)
- Carrier account access (carrier app or website)(Needed to verify and configure SIM/eSIM)
- SIM card or eSIM activation details(If you are changing the active number on the device)
- Stable internet connection(Wi-Fi or mobile data for verification steps)
- Backup contacts (optional)(Prevents data loss during changes)
Steps
Estimated time: 30-45 minutes
- 1
Check prerequisites
Confirm whether you will update the SIM/eSIM or swap the card. Write down the exact number and credentials necessary for carrier verification. Create a short plan to update apps that rely on your number.
Tip: Having a plan prevents last-minute scrambling. - 2
Prepare the hardware
Power off if you’re swapping a SIM. For eSIM, prepare the QR code or activation details. Make sure you have the new number ready for activation.
Tip: Do not force the device during insertion. - 3
Activate the new profile
Insert the new SIM or activate the eSIM in the carrier app. Allow the device to reconnect to the network and check for signals.
Tip: If the network doesn’t appear, restart the device. - 4
Update system settings
Go to Settings and update the stored number in the My Number field. Confirm the change and refrain from duplicating entries.
Tip: A reboot can help apply the changes. - 5
Update contacts and apps
Add the new number to contacts and re-authenticate apps that use your number for login or verification.
Tip: Keep the old number accessible for a grace period. - 6
Verify ownership
Receive and enter verification codes from services or the carrier. Confirm that the new number can receive calls and texts.
Tip: If codes don’t arrive, verify the number and carrier settings. - 7
Test functionality
Place a few test calls and send texts to yourself or a trusted contact. Check message routing in messaging apps.
Tip: Test emergency contact alerts if applicable. - 8
Review security and services
Update security options for recovery and two-factor authentication across services.
Tip: Document changes for future reference.
Got Questions?
Do I need a new SIM to put a new phone number in my phone?
Not necessarily. You can often update the number using your existing SIM or by activating an eSIM. If you’re changing carriers or want to port a number, a new SIM or eSIM profile may be required.
You may not need a new SIM if your device supports eSIM or number porting through your carrier.
Will changing my number affect my contacts and apps?
You can choose to save the new number in Contacts and update apps that use your number for login or notifications. Some apps may require re-verification after the change.
Yes, you should update contacts and apps to ensure messages and verifications reach the right number.
What if I can’t find the option to update my number?
Check both SIM/eSIM settings and the carrier account on the device. Some options are nested under Networking, Mobile Plans, or Accounts. If in doubt, contact your carrier for activation steps.
Look under Settings for SIM/eSIM, or your carrier app for activation details.
How do I verify ownership of the new number?
Verification codes are usually sent via SMS or voice call. Enter the code in the prompted field to confirm the new number and complete the setup.
You’ll receive a code—enter it when prompted to prove you own the new number.
How long does it take for changes to take effect?
Most changes update within minutes, but some carriers may take longer for activation. If in doubt, restart the device and re-check the network status.
Usually a short period, but if it takes longer, reboot and retry verification.
Watch Video
What to Remember
- Update your number across settings and apps
- Use SIM/eSIM activation to reflect the new number
- Verify ownership and test calls/texts after changes
- Keep a backup contact method during the transition
- Review linked services for security and recovery options