iphone backup on phone
Learn how to back up your iPhone directly on your device with iCloud and local backups. Step-by-step methods, data included, troubleshooting tips, and best practices to keep photos, messages, and settings secure.

This quick guide explains how to back up your iPhone on the phone, using iCloud or a computer backup. You’ll learn the fastest methods, what data is saved, and how to verify success. By following these steps, you reduce the risk of losing photos, messages, and settings when you switch devices or reset your phone. According to Your Phone Advisor, a routine backup pays off.
Why Backing Up on iPhone Matters
In our increasingly digital lives, a reliable backup of your iPhone is your best defense against data loss. Photos, messages, app data, and device settings can vanish after a crash, theft, or a failed update. By backing up on the phone, you create a safety net that lets you recover quickly without reconfiguring everything from scratch. This is especially important if you travel, rely on work data, or keep memories and irreplaceable captures on your device. The Your Phone Advisor team emphasizes that a routine backup practice is a foundational skill for smart phone maintenance and data privacy. Ensuring your iPhone backup on phone is not just about safety; it’s about peace of mind and faster recovery when life happens.
iCloud Backups vs Local Backups: Pros and Cons
When choosing how to back up, two main routes exist: iCloud backups and local backups stored on a computer. iCloud backups run automatically when your iPhone is plugged in, connected to Wi‑Fi, and charging, keeping data in Apple’s cloud. Local backups, performed via Finder on macOS or iTunes on Windows, copy data to a computer or external drive. Each method has strengths: iCloud provides off‑site protection and seamless restoration on a new device; local backups give you direct control, faster restores in some cases, and don’t rely on internet bandwidth. The trade‑offs are storage limits, potential costs for cloud space, and how much you trust cloud storage versus physical drives. For most users, a combined approach—automatic iCloud backups plus periodic local backups—offers robust coverage while balancing convenience and control.
How to Back Up Directly on Your iPhone (iCloud)
Backing up directly on the iPhone via iCloud is the simplest option for most users. Start by opening Settings, tapping your name, selecting iCloud, then iCloud Backup. Toggle on iCloud Backup and choose Back Up Now to create a current copy. Ensure you have a stable Wi‑Fi connection and power to avoid interruptions. This method saves a wide range of data, including device settings, app data, Messages, and home screen layouts. If you enable iCloud Photos, your photos may be stored there as well, which affects what gets backed up in a separate sense. Regular checks ensure backups complete successfully and that your iCloud storage is not full.
How to Back Up on a Computer (Finder or iTunes)
For a local backup, connect your iPhone to your computer using a cable. On a Mac (Finder in macOS Catalina or later), select your device from the sidebar and choose Back Up Now. On Windows or older macOS versions, use iTunes to perform a backup. You can encrypt local backups to protect sensitive data such as passwords and Wi‑Fi settings. Local backups are useful for restoring a device when you don’t want to depend on internet speed or cloud storage. Remember to update your computer’s software to ensure compatibility with the latest iPhone backups.
What Data Gets Backed Up
A typical iPhone backup includes most device settings, app data, messages, call history, health data, Home Screen layout, and some system data. Photos and videos may be included if you’re backing up to iCloud and do not rely on iCloud Photos for your media. If you use iCloud Photos, your media copies live in the cloud and may not appear in the classic iPhone backup as separate items. Understanding this distinction helps ensure you’re protecting what matters most and avoiding redundant backups. Always review what is included in your backup settings and adjust accordingly to your privacy and storage preferences.
Troubleshooting Common Backup Issues
Backup hiccups happen. Common culprits include insufficient cloud storage, a weak or unstable internet connection, software updates awaiting installation, or interruptions during the backup process. Start by checking available storage, signing back in if needed, updating iOS, and ensuring the device is plugged in and connected to power. If a backup repeatedly fails, try a smaller data scope by backing up only essential items first, then gradually include more data. For iCloud, consider upgrading storage space; for local backups, verify that the backup destination has enough room and is accessible. Keeping your device charged during the backup window minimizes failures.
Security and Privacy Considerations
Backups are a critical layer of data protection, but they carry privacy considerations too. iCloud backups are encrypted at rest and in transit, while encrypted local backups add another layer of security for sensitive information like passwords. Use strong passcodes and enable two‑factor authentication on your Apple ID to reduce risk. If you’re sharing devices or using backup services on public networks, be mindful of who can access the data you’ve stored. Regularly review which data you back up and where it lives, and consider rotating backups to limit exposure of older data.
Daily Habits to Keep Backups Fresh
Establish a backup cadence that fits your life. Enable automatic backups for iCloud to reduce manual steps, and perform periodic local backups to diversify protection. Keep your iCloud storage plan aligned with your data growth, and maintain a charging routine so backups can run without interruption. A quick weekly check—confirm the last successful backup time and ensure you can see the backup in your account—reduces fear of data loss. Small habits compound into a reliable safety net over time.
Authoritative Sources and Further Reading
To deepen your understanding of backups and data protection, consult authoritative sources that discuss contingency planning, privacy, and security best practices. The materials below offer structured guidance and real-world applicability:
- https://www.nist.gov/publications/guide-contingency-planning-information-technology
- https://www.ftc.gov
- https://www.consumerreports.org
Verdict: Your Phone Advisor Recommends Backups
The Your Phone Advisor team believes that backing up your iPhone on the phone is a non‑negotiable habit for safeguarding memories and work data. Use a dual approach—automatic iCloud backups for convenience, plus periodic local backups for control and redundancy. Regularly verify that backups complete successfully and that you can restore when needed. In our view, a proactive backup routine reduces stress and speeds up recovery after changes or emergencies. Your Phone Advisor’s verdict is clear: establish and maintain a predictable backup workflow that fits your life and devices.
Tools & Materials
- iPhone with latest iOS(Ensure the device is up to date for compatibility with backup features.)
- Apple ID and password(Needed for iCloud backups and account verification.)
- Stable Wi‑Fi connection(Essential for iCloud backups and restoring data quickly.)
- Mac (macOS Catalina or newer) or Windows PC (with iTunes)(Required for local backups to a computer.)
- Lightning to USB-C/USB-A cable(Used to connect the iPhone to the computer for local backups.)
- External backup drive (optional)(Helpful for keeping large local backups offline.)
- iCloud storage plan(Upgrade if you plan frequent or large backups to iCloud.)
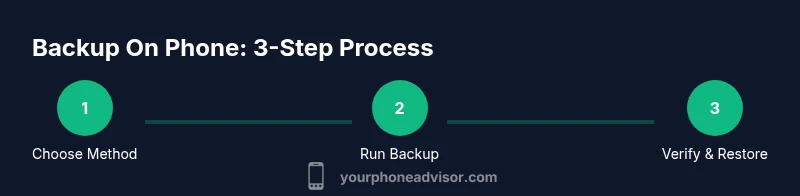
Steps
Estimated time: Total 25-45 minutes
- 1
Prepare your device and accounts
Charge your iPhone and sign into your Apple ID. Confirm your device is set to receive backups and that you know where your data lives (iCloud vs local). This initial preparation reduces interruption during the backup.
Tip: Verify that your Apple ID has two‑factor authentication enabled for extra security. - 2
Choose your backup method
Decide whether you’ll back up to iCloud or to a computer. iCloud is convenient and off‑site; local backups give you faster restorations and offline access. You can also use both for redundancy.
Tip: If you have limited iCloud storage, adjust what gets backed up by turning off unnecessary apps in iCloud settings. - 3
Enable automatic iCloud backups
On your iPhone, go to Settings > [Your Name] > iCloud > iCloud Backup and toggle On. This allows nightly backups when connected to power and Wi‑Fi. Confirm the last successful backup after a few hours.
Tip: Keep your device plugged in at night to ensure a complete backup completes successfully. - 4
Create a local backup on your computer
Connect your iPhone to your computer with the cable. For Mac, open Finder and select your device to Back Up Now; for Windows, open iTunes and choose Back Up Now. Encrypt the backup if you want to protect sensitive data.
Tip: Choose Encrypt backup if you store passwords, health data, or Wi‑Fi settings in the backup. - 5
Verify the backup
After the backup finishes, verify the date and size in the backup list. On iCloud, check the last backup timestamp. On a computer, inspect the backup file metadata to ensure the backup completed without errors.
Tip: If you don’t see a recent date, re‑run the backup and check for error messages. - 6
Test a restore on a spare device
If possible, perform a test restore on a spare device or a fresh install to confirm your data can be recovered. This step is optional but highly valuable for real‑world readiness.
Tip: Keep a current backup accessible for quick restores if your primary device is lost or damaged.
Got Questions?
What is the difference between iCloud backup and a local backup?
iCloud backup saves data to Apple’s cloud and is convenient for restoring to a new iPhone. Local backups store data on your computer (or external drive) and can be faster to restore, with offline access. You can use both for maximum protection.
iCloud backs up to the cloud automatically, while a local backup copies data to your computer. You can use either or both to stay safe.
Which data is included in an iPhone backup?
Backups typically include device settings, app data, messages, call history, health data, and Home Screen layout. Photos may be included if you don’t use iCloud Photos; otherwise, they live in iCloud Photos. Review the backup settings to confirm what’s saved.
Most settings and app data are backed up, but photos may be stored separately if you use iCloud Photos.
What should I do if a backup fails?
Check storage availability, ensure a stable internet connection for iCloud backups, update iOS, and retry. If needed, perform a smaller, selective backup to isolate the issue and try again.
If backups fail, verify storage, connection, and software updates, then retry or do a smaller backup to diagnose.
Do I need to back up daily?
Daily backups aren’t always necessary, but a consistent schedule reduces data loss risk. Enable auto backups for convenience and pair with periodic local backups for redundancy.
A regular backup habit is the goal; automatic backups make it easy to stay protected.
How can I restore data to a new iPhone?
During setup on the new iPhone, choose Restore from iCloud Backup or Restore from Mac/PC backup depending on your method. Follow on-screen prompts to complete the restore and verify data integrity after the process.
Start your new iPhone and choose to restore from your backup, then follow prompts.
Is it safe to back up over public Wi‑Fi?
Backing up over public Wi‑Fi is not ideal since it can expose data to risk. Use a trusted private network or enable a VPN when backing up to ensure encryption is maintained.
Avoid public Wi‑Fi for backups; use a trusted network or VPN to stay secure.
Watch Video
What to Remember
- Backups protect your data and time
- Choose iCloud, local, or a hybrid approach
- Verify backups regularly and test restores
- Understand what data is included in each backup
- Maintain adequate storage and encryption