White Spots on Phone: Troubleshooting Guide
Urgent guide to diagnose and fix white spots on your phone. Learn common causes, at-home checks, software fixes, and when to seek professional help in 2026.

White spots on phone are usually display-related (dead or stuck pixels, backlight bleed, or pressure damage). Start with software checks: reboot, safe mode, OS updates, and remove any screen protector. If spots persist, assess hardware vs software and consider warranty coverage. Quick home tests can help you decide whether to repair or replace.
Understanding white spots on phone
White spots on phone are patches on your screen that remain bright or discolored when the rest of the display shows normal content. They can be caused by hardware factors (dead pixels, stuck pixels, backlight bleed, OLED burn-in, or panel pressure) or software-related glitches (graphics driver issues or temporary rendering bugs). According to Your Phone Advisor, the first step is not to panic: many spots are fixable and identifying the type helps you pick the right path. In modern smartphones, the exact behavior depends on the panel technology: OLEDs can show lingering burn-in effects, while LCDs may exhibit dead pixel clusters. Always consider whether a screen protector or case is contributing to pressure on the screen. In some cases, a moisture event or temperature fluctuation can cause transient spots that disappear after a restart or cooldown.
Common causes explained
White spots on phone can arise from several sources. Hardware faults like dead or stuck pixels occur when a portion of the screen stops or misreports color. Backlight bleed happens when light leaks around the edges or through a panel layer, creating bright patches. OLED burn-in leaves persistent afterimages from prolonged display of a static image. Pressure damage from a tight case or incorrectly installed screen protector can create temporary or permanent spots. Moisture or humidity behind the display may show as pale patches. Software-related issues include glitches in the graphics driver or temporary rendering bugs after a software update. Most users notice these spots in bright areas or when the screen is set to high brightness.
How to tell software vs hardware: quick indicators
Software glitches often fade with a restart or after a software update. If the spot changes when you switch apps or brightness, or disappears in Safe Mode, it’s more likely software-related. Hardware issues persist across reboots and Safe Mode. Pixel-level faults (stuck or dead) remain stationary, while burn-in can survive even after color calibration attempts. If you’ve recently dropped the device or exposed it to high heat or moisture, hardware damage is more likely. Document when the spots appear and whether they correlate with specific tasks or apps to help the next technician.
Home testing steps you can run now
To assess the problem at home, perform a color test by viewing pure white, red, green, and blue full-screen images. If white spots appear only on certain colors, it may indicate a subpixel or panel issue. Use a flashlight or bright light at an angle to inspect the screen for pressure marks or unusual flexing. Remove any case or screen protector and press gently around the edges to see if the spot moves or changes—temporary pressure can cause transient patches. If the device has a removable battery, ensure it’s seated properly after reassembly if you recently opened the device.
Software fixes you can try safely (without voiding warranty)
Begin with the basics: reboot the device, check for OS updates, and clear cache for graphics-related apps if your OS supports it. If your device has a pixel refresh option or a display calibration feature, run it per the manufacturer’s instructions. In some cases, a factory reset is a last resort to rule out software corruption, but back up all data first. If the spots persist after a reset, it’s likely a hardware issue and may require professional service.
When to replace or seek professional help
If hardware causes are suspected (dead pixels, backlight failure, OLED burn-in, or pressure damage from a drop), professional screen replacement is often the only lasting fix. If the phone is under warranty or covered by a protection plan, contact the manufacturer or retailer first to explore repair or replacement options. Schedule a diagnostic with an authorized service center if you notice that the spots are spreading, intensifying, or affecting touch sensitivity. Always back up your data before any repair or warranty process to prevent loss.
Moisture and humidity: protect your display from water damage
Moisture behind the display can create pale or shimmering spots that worsen with temperature changes. Keep devices away from baths, kitchens, and humid environments. If the device has been exposed to liquid, power off immediately and avoid charging until inspected. Do not attempt to dry the device with heat sources, as this can warp panels or drive moisture deeper into the device. A professional can safely disassemble and dry internal components if needed.
Prevention: care and habits to reduce future spots
Invest in a quality screen protector and a protective case that minimizes edge pressure. Avoid stacking heavy objects on the phone or applying excessive pressure on the display. Regular software updates can prevent rendering bugs, and periodic reboots can clear graphics memory that may contribute to transient glitches. For OLED screens, be mindful of static app usage (like a static home screen image) and use features that reduce screenshot burn-in risk. If you notice persistent spots, address them promptly rather than waiting for them to worsen.
Data backup, warranty, and service options
Before any repair, back up your data to the cloud or a local computer. Review your warranty status and coverage for screen-related faults, as many brands provide screen protection under certain plans. If a repair is needed, compare at-home fixes vs. professional service costs and timeframes. After repair, verify that the issue is resolved with a follow-up test across different colors and brightness levels. Consider extending protection with an accidental damage plan to guard against future issues.
What to expect during repair and repair timelines
Repair timelines vary by device and location but typically involve diagnostic tests, parts availability, and labor time. For display-related faults, expect a screen replacement if the fault is hardware-based. Many shops offer same-day service for standard screens, while some devices require an appointment window. Ask for a detailed estimate that includes parts, labor, and potential data-safe steps. If the phone is older, assess whether upgrading to a newer model is more cost-effective than repair.
Steps
Estimated time: 25-40 minutes
- 1
Reboot and inspect
Power off, wait 30 seconds, then power back on. Remove any case or protective layer gently and wipe the screen with a clean microfiber cloth. Observe whether the spots stay fixed or change under different brightness levels.
Tip: If you recently dropped the phone, skip aggressive pressing near the screen; surface damage may be present. - 2
Run a color test
Display pure white, red, green, and blue full-screen images to see if spots appear consistently across colors. This helps differentiate a subpixel issue from a full-panel fault. Document findings for the technician.
Tip: Take clear screenshots showing color screens with the spots visible. - 3
Check for software updates
Go to Settings > System > Software Updates and install any available updates. A graphics driver or display rendering bug can be fixed with an OS patch.
Tip: If your device is in beta software, consider reverting to stable release to see if the issue resolves. - 4
Safe mode test
Boot into Safe Mode to disable third-party apps temporarily. If spots disappear in Safe Mode, a conflicting app or overlay may be the culprit.
Tip: Note which apps you used before the issue began to narrow down the offender. - 5
Perform a display reset / calibration (if available)
Some devices offer a display calibration or pixel refresh option under Display settings. Run it following the on-screen instructions.
Tip: If you’re unsure, consult the manufacturer’s support page to avoid misconfigurations. - 6
Backup and consider a factory reset
If software fixes fail, back up data and perform a factory reset as a last resort. This eliminates software corruption that might look like hardware faults.
Tip: Only proceed after you’ve secured backups; factory reset erases all data. - 7
Consult a professional
If spots persist after tests and resets, book a diagnostic at an authorized service center. Hardware faults require replacement or repair.
Tip: Request a written estimate and confirm warranty eligibility before approving work.
Diagnosis: Visible white spots on phone screen
Possible Causes
- highStuck or dead pixels (hardware fault)
- highBacklight bleed or OLED burn-in (hardware fault)
- mediumPressure damage from case/screen protector (hardware fault)
- lowMoisture or water damage behind the display (hardware fault)
- mediumSoftware rendering glitch or display driver issue (software fault)
Fixes
- easyRun a color test and reboot; check for software updates
- easyEnter safe mode and observe if spots persist
- easyDetach/remove screen protector and inspect pressure from case; attempt display reset
- hardIf hardware fault suspected, seek professional screen repair or replacement
- mediumBack up data and perform factory reset as a last resort (data loss risk)
Got Questions?
What causes white spots on a phone screen?
White spots are usually display issues: dead or stuck pixels, backlight bleed, OLED burn-in, or pressure damage. Software glitches can also mirror this symptom. Diagnosing which category it falls into guides the right fix.
Most white spots come from display hardware like pixels or backlight, though software glitches can mimic the symptom.
Can a software update fix white spots on my screen?
A software update can fix rendering bugs that resemble spots, but it cannot repair physical damage. If the spots persist after updates and restarts, hardware fault is more likely.
Software updates can fix bugs, but hardware faults require a repair.
How do I know if it’s burn-in or dead pixels?
Burn-in from static images appears as persistent afterimages, often in areas where a logo or app has stayed fixed. Dead pixels remain dark, or stuck pixels stay bright across colors. Pixel tests help distinguish them.
Burn-in looks like a ghost image; dead pixels are black or fixed colored spots.
Will warranty cover display issues?
Warranty eligibility depends on the cause and the warranty terms. Cosmetic damage from drops is often not covered, but manufacturer defects or manufacturing-related backlight issues may be. Check your warranty status and contact support.
Warranty may cover manufacturing defects; check your terms and contact support.
How long does a screen repair take?
Repair times vary by model and location. Some shops offer same-day screen replacements; others may take a few days if parts aren’t in stock. Always request an estimated completion date before agreeing to service.
Most screen repairs take from a few hours to a few days depending on parts.
Are there safe DIY tests I can run?
Yes—basic tests like color screens, brightness variation, and Safe Mode can help you triage. Avoid invasive repairs and always back up data before attempting reset or software-level changes.
Try safe mode and color tests; back up data first.
Watch Video
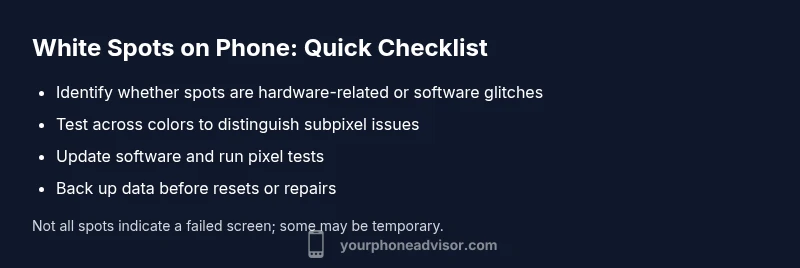
What to Remember
- Start with software checks before hardware repairs
- Differentiate stuck pixels, burn-in, and backlight issues
- Back up data before any reset or repair
- Professional repair is often required for panel faults
- Prevention reduces future display problems