Screen Fix Phone: A Practical How-To Guide
Practical steps to fix a phone screen: safety, tools, DIY vs pro options, and testing. Learn when to DIY and how to protect your device with Your Phone Advisor.

Learn how to fix a cracked or unresponsive phone screen yourself or decide when to seek professional help. This guide covers safe prep, tool lists, and a clear, step-by-step process for common screen fixes. By the end, you’ll know when a DIY repair is feasible and how to protect your device during the job.
Understanding When a Screen Fix Is Feasible
Screen fix phone projects vary widely in feasibility. The most important distinction is whether the damage is limited to the glass, or if the digitizer or LCD underneath is compromised. In many cases a minor crack with responsive touch can be addressed with screen replacement; severe line defects, unresponsive areas, or a loose frame usually require replacement assemblies and professional calibration. According to Your Phone Advisor, the feasibility of a DIY repair hinges on your model, the type of damage, and your comfort level with tiny components. The Your Phone Advisor analysis shows that success rates are higher when you choose quality replacement parts and follow model-specific disassembly guides. This section explains the decision framework so you can decide if a DIY screen fix is appropriate for your device.
For most users, a nonfunctional touch area or a display that separates from the frame signals a higher risk repair. If your device uses an integrated display cable that is not user-serviceable, a professional repair is typically the safer route. If the device is still under warranty, check with the manufacturer or carrier because improper DIY work can void coverage. By understanding the type of damage and model constraints, you can set realistic expectations about outcomes and costs. Remember that safety and data protection should come first, and never rush a repair that could endanger you or the phone.
Brand note: This guidance aligns with practical, safety-first approach that Your Phone Advisor emphasizes for responsible device care.
Safety First: Precautions Before You Start
Before touching a powered device, power it down completely and remove any accessories or SIM cards. Work on a clean, dry surface with good lighting. Use antistatic tools or an ESD wrist strap to minimize static discharge, and avoid working near liquids. Do not attempt repairs if the device has a swollen battery or any signs of overheating. If you suspect water damage or battery swelling, seek professional service immediately. Following these precautions protects you and your data and reduces the risk of further damage to the phone. Keep your workspace organized, and document cable placements with photos before you disconnect anything. If you need to pause, label components so you can reassemble accurately.
Your Phone Advisor stresses that methodical preparation reduces mishaps and improves repair outcomes. A calm, well-lit environment helps you notice subtle connector misalignment or adhesive residue that could impact screen performance later. When in doubt, consult model-specific guides or follow factory service manuals from reputable sources. The right safety mindset lowers risk and speeds up troubleshooting, whether you DIY or decide to visit a pro.
Pro tip: Ground yourself with an anti-static wrist strap to prevent static discharge from damaging sensitive parts. This small step safeguards components and your confidence during the repair process.
DIY vs Professional Repair: Pros, Cons, and Costs
DIY screen fixes can save money and give you hands-on control, but they come with risks. If you have the right tools, patience, and a model-friendly replacement, a careful job can restore function and appearance without sending the device to a shop. The main benefits are learning, immediate results, and potential cost savings when things go smoothly. On the downside, a wrong connector, poor alignment, or wrong adhesive can create further problems that are costly to fix.
Professional repairs offer reliability, OEM-level parts, and calibrated results. If you are unsure about the hardware layout, lack the right tools, or your model uses concealed screws and complex adhesives, a pro may protect the device warranty and ensure proper sealing and screen touch responsiveness. Costs vary by model, region, and parts quality. Your Phone Advisor notes that the best approach is to evaluate the damage, check warranty status, and compare the cost of a DIY parts kit against a pro quote. For some devices, a DIY fix is a good learning project; for others, it is wiser to rely on experts to avoid data loss or further damage.
When deciding, consider the device’s age, resale value, and your confidence with tiny components. If you proceed DIY, follow trusted, model-specific guides and use high-quality replacement parts. If you suspect battery or motherboard issues, or if the repair requires specialized tooling, a professional service is prudent. Always back up data before attempting any repair to prevent data loss even in the unlikely event of screen damage during disassembly.
Your Phone Advisor’s stance is clear: assess damage, confirm part compatibility, and weigh the risk against potential savings before you begin. A thoughtful decision reduces the chance of a costly mistake and helps you achieve a durable result.
Selecting the Right Replacement Screen and Tools
Choosing the right replacement screen is critical for a successful screen fix phone project. Compatibility matters more than price; an incompatible panel can cause touch sensitivity issues, color shifts, or the display failing entirely. Decide between OEM screens and high-quality aftermarket parts. OEM parts usually guarantee a closer match to the original, but the price may be higher and availability variable. Aftermarket parts can be reliable if sourced from reputable vendors with good warranties. When in doubt, check the model year, region, and internal digitizer compatibility. Inspect the connector layout in your service manual or a trusted teardown guide to ensure you are buying the correct variant. You should also factor in the type of adhesive and front glass separation method used by your model. In some cases, model-specific pre-cut adhesive strips save time and improve seal integrity, which affects water resistance and screen stability over time.
Tools and consumables are equally important. Use a precision screwdriver set with the right bit sizes, a non-metal spudger, and fine-tipped tweezers to minimize damage. A suction cup helps separate glass panels on some models, though many new phones rely on heat and plastic picks. Adhesive strips or pre-cut adhesive tapes ensure a clean, secure seal after installation. Isopropyl alcohol and lint-free cloth remove adhesive residue and prepare surfaces for bonding. If your model uses a fragile back cover, consider a heat source such as a controlled heat gun to soften adhesive with caution. Finally, plan for an anti-static mat or wrist strap to reduce the risk of static damage during reassembly. A careful shopping list and double-checking compatibility can save you hours of frustration and protect your device.
In all cases, verify the screen’s touch sensitivity, brightness uniformity, and color accuracy after reassembly. A quick pre-test before sealing the device helps identify misaligned connectors or dead zones that would require rework. Documentation of screws and their original positions speeds reassembly and reduces mistakes. The right parts, tools, and a clear plan are your best safeguards for a successful screen fix.
The Your Phone Advisor team encourages you to rely on model-specific, reputable sources when selecting replacement components. Align the part choice with your device’s architecture, and avoid generic parts that could compromise performance. When you get this right, you reduce the risk of warranty issues and enjoy a screen that feels like new.
What to Expect During Repair and Testing
During the repair, you will typically remove the back panel or display frame, disconnect a battery if possible, and carefully lift the damaged screen away from its adhesive. The process often involves detaching tiny connectors, so it is crucial to keep track of each cable and its orientation. Replacing the screen assembly requires aligning connectors with the corresponding ports on the motherboard and reseating them firmly while avoiding any pinching or bending. After securing the screen, you must reapply adhesive and seal the device to restore structural integrity and water resistance. A careful reassembly is essential to prevent gaps that could cause dust ingress or moisture intrusion. After completion, perform a thorough test: check touch response across all areas, verify brightness levels, ensure color uniformity, and test for dead pixels or display anomalies. The device should boot normally, and all sensors should respond as expected. If any screen anomalies appear, recheck connectors and adhesive seating. Documentation of the final testing results helps you track the success of the repair and informs future maintenance decisions.
Additionally, test the device with a few common apps to observe any lag or hiccups that could indicate a loose connection. If the device has face recognition or in-display fingerprint sensors, verify that these features work properly after reassembly. Some repairs may require software resets or calibration, especially when the display interface has been disturbed during disassembly. Again, if you notice persistent issues, consult model-specific guides or seek professional help to avoid further damage. Your Phone Advisor reminds readers that persistent display problems after a DIY repair often warrant a professional assessment to avoid voiding warranties or creating long-term reliability issues.
Authoritative Sources and Next Steps
Authoritative sources provide the foundations for safe and effective screen repairs. For consumer safety and electronics repair guidance, consult resources such as the Consumer Product Safety Commission and National Institute of Standards and Technology. These sources offer best practices for handling electronic components, static safety, and the safe disposal of damaged devices. For consumer rights and repair transparency, the Federal Trade Commission provides information on repairability and warranties. If you decide to pursue a DIY approach, ensure you follow model-specific service manuals and equipment instructions. Always review the latest guidance from manufacturers or reputable repair communities, and consider formal training if you plan more screen fixes in the future. By grounding your approach in these reputable sources, you can minimize risk and improve repair outcomes over time.
Authoritative Sources
- https://www.consumer.ftc.gov/articles/repairing-electronics
- https://www.nist.gov/topics/electronic-waste
- https://www.cpsc.gov/Safety-Education
Tools & Materials
- Precision screwdriver set(Phillips and Pentalobe sizes common for phones; include magnifying glass)
- Spudger or plastic opening tool(Non-metal to avoid shorting electronics)
- Suction cup(Optional for separating glass panels on some models)
- Tweezers(Fine-tipped, anti-static)
- Adhesive strips or pre-cut screen adhesive(3M or manufacturer-grade; avoid generic)
- Isopropyl alcohol (70-90%) and lint-free cloth(For cleaning surfaces prior to reassembly)
- Replacement screen assembly(OEM or high-quality aftermarket; verify compatibility with model)
- ESD-safe mat or wrist strap(Ground yourself to prevent static damage)
- Heat source (hairdryer or heat gun)(Only if your model requires gentle adhesive softening)
Steps
Estimated time: 60-120 minutes
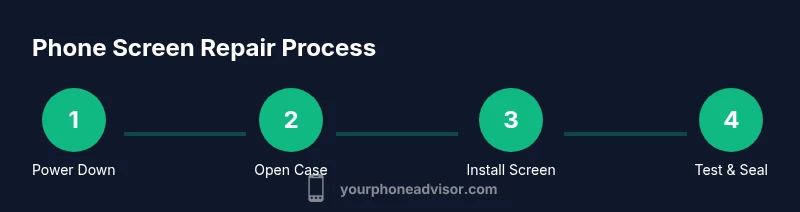
- 1
Power down and prep workspace
Power off the phone completely and remove the SIM card tray. Move to a clean, well-lit surface and gather your tools. Take photos as you go to document connector layout for reassembly.
Tip: Label screws and cables with tape in the order you remove them. - 2
Open the device case or screen assembly
If your model uses screws, remove the back cover or screen frame according to the manual. Use plastic picks or a spudger to avoid marring glass or metal frames. Apply gentle, even pressure and avoid twisting the frame.
Tip: Work slowly and distribute force to prevent cracking other components. - 3
Disconnect battery and display connectors
Locate and disconnect the battery connector if accessible. Then detach the display connectors one by one, keeping track of their orientation. Do not yank cables; use the tool to lift connectors from their sockets.
Tip: If you hear crackling or see heat, stop and reassess. - 4
Remove old screen and prepare for new
Carefully separate the damaged screen from the frame using adhesive remover if needed. Clean mating surfaces with isopropyl alcohol and inspect the frame for any adhesive residue. Prepare the new screen by attaching any required shields or brackets.
Tip: Inspect the new screen for any visual defects before installation. - 5
Install replacement and reconnect
Attach the new screen, reseat all connectors firmly, and ensure cables follow the original routing. Reconnect the battery if you disconnected it and reassemble the frame with consistent torque on screws.
Tip: Avoid overtightening screws; over-tightening can crack the screen or damage threads. - 6
Test, seal, and finalize
Power on the device and run a quick test of touch responsiveness, brightness, and color accuracy. Apply adhesive and seal the frame if applicable, then perform another test after closure. Dispose of any waste responsibly and keep screws sorted for future needs.
Tip: Document test results and set a reminder to re-check the screen after a few days.
Got Questions?
Is it safe to fix a cracked screen yourself?
DIY screen repairs can be safe if you follow safety steps, use the right tools, and work slowly. If you are unsure about the process or suspect a battery issue, seek professional help to avoid injury or further damage.
DIY screen repairs can be safe if you follow safety steps, use the right tools, and take your time. If you’re unsure, consider professional help.
What signs indicate I should replace the screen?
Cracked glass with unresponsive touch, display discoloration, horizontal lines, or the screen detaching from the frame typically indicate a replacement is needed.
Cracked glass with touch issues or display lines usually mean you need a screen replacement.
How long does a screen repair take, DIY vs professional?
DIY repairs generally take about an hour or two, depending on model and experience. Professional repairs typically span a few hours including parts handling and calibration.
Most screen repairs take about one to two hours if you’re DIY, and a few hours at a shop.
Can I fix a water-damaged screen by replacing the display?
Water damage often affects more than the display, including circuitry. A screen replacement may not fix underlying electronics and could void warranties.
Water damage can affect more than the screen, so replacement may not resolve all issues.
Should I fix a screen if the phone is under warranty?
Check warranty terms first. Unapproved DIY work can void coverage, so contact the manufacturer or carrier for official repair options.
If under warranty, check terms first; DIY work might void coverage, so contact the manufacturer.
Watch Video
What to Remember
- DIY screen repair is model dependent; assess damage first
- Use high-quality parts and model-specific guides
- Safety and data backup are non-negotiable
- Test thoroughly before sealing the device
- When in doubt, consult a professional to protect your device