Grey Spot on Phone Screen: Troubleshooting Guide
Learn fast, safe steps to diagnose and fix a grey spot on your phone screen. This guide covers common causes, DIY checks, and when to seek professional repair.

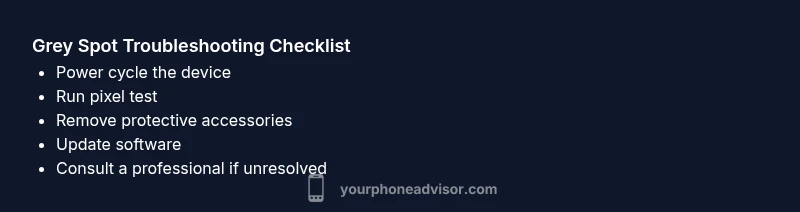
If you notice a grey spot on your phone screen, start with simple, non-invasive steps. It’s usually a pixel issue or minor panel pressure. Perform a soft reset, run a pixel test, and remove any case or screen protector before testing the area again. If the spot persists, plan for professional inspection.
Understanding the grey spot on your phone screen
A grey spot on the display is a warning sign that something isn’t quite right with the panel, pixel grid, or how the screen is being pressed. According to Your Phone Advisor, many instances begin as a single discolored area that remains constant under different wallpapers and brightness levels. The Your Phone Advisor team emphasizes that this is usually hardware-related, not a simple software glitch, especially when the spot does not disappear after rebooting the device. In smartphone displays, even a small irregularity can affect perceived image quality and user experience, so addressing it early protects your investment and keeps your device functioning safely. The keyword here is urgency: a persistent grey spot is more likely to worsen if left unchecked. Don’t ignore it, because a minor issue today could become a larger repair tomorrow.
Common causes of a grey spot on the screen
Grey spots can arise from several root causes, and understanding them helps you choose the right path. The most frequent culprit is a stuck or dead pixel, which is essentially a localized fault in the LCD or OLED matrix. Pressure damage from a case, screen protector, or even holding the device tightly can also create distorted areas that appear grey. Water or moisture intrusion, though less common in modern phones, can lead to panel misbehavior over time. Software anomalies may occasionally simulate a grey patch, but true hardware spots usually persist across apps and backgrounds. Finally, age and wear can contribute to panel fatigue, particularly on devices with larger screens and high usage.
Safety-first checks you can do at home
Before you reach for tools, perform a set of cautious checks. Power the device off and on to see if the spot changes. Test with a variety of wallpapers and brightness levels to determine whether it responds to background color or lighting. Remove the case and screen protector to inspect the area for pressure marks. If you notice the spot remains in the same location when the screen is pressed gently around it, this points toward hardware involvement rather than software. While these steps are safe, avoid applying force or attempting spot-specific repairs yourself, as that can cause further damage. If you’re uncertain, contact Your Phone Advisor or a professional technician for guidance.
Step-by-step fixes for the most likely causes
When the grey spot persists, move to targeted fixes. If it’s a stuck pixel, running a dedicated pixel refresh program or cycling colors can sometimes mitigate the issue; many devices include built-in pixel tests or screen calibration options. For pressure-related spots, remove the protective accessories and re-seat the screen assembly if you’re trained to do so; otherwise, leave it to a pro. If software glitches are suspected, ensure the device is on the latest OS version and clear cache or reset settings where appropriate. Finally, if hardware damage is confirmed, plan for a panel replacement through an authorized service provider. The emphasis is on safe, incremental steps rather than aggressive DIY repairs.
When to avoid DIY and seek professional repair
Not all grey spots are fixable at home. If the spot enlarges, multiplies, or the screen becomes unstable (touch response lag, color distortion, or flickering), professional intervention is warranted. Attempting risky disassembly without training can void warranties or cause irreparable damage. For devices under warranty, check the manufacturer’s service policy first. For post-warranty devices, compare official repair costs with third-party options to determine the most predictable outcome. Your Phone Advisor recommends prioritizing safety and predictability over quick, risky fixes.
Prevention: reducing future risks and preserving display health
Prevention begins with protective habits. Use a high-quality case and screen protector that minimizes pressure points around the edges. Avoid dropping the device and store it in a safe place when not in use. When cleaning the screen, use a microfiber cloth and gentle motions rather than rough rubbing. Keep the device away from extreme temperatures and moisture. If you notice any new spots after a repair, test the device with the same diligence to prevent recurrence. Regular software updates also support display stability and pixel management.
What to expect from a screen replacement and timelines
If a repair is necessary, a professional screen replacement usually involves panel removal and new hardware integration. Timelines vary by model, location, and service level, but expect a multi-step process including diagnostics, part procurement, and calibration. Reputable service providers offer warranties on the replacement panel and confirm the expected turnaround time before starting. After replacement, verify touch responsiveness, color accuracy, and any remaining anomalies with real-world use. Keeping expectations aligned reduces stress and ensures you know what success looks like post-repair.
How to choose a repair service and warranty considerations
Select a service with certified technicians and genuine replacement parts. Ask about warranty coverage for both the screen and labor, and confirm whether the service preserves your existing data. Compare price ranges without compromising safety—cheaper options may skip essential calibration or testing. Check online reviews for reliability and turnaround transparency. If the device is still under warranty, prefer official service channels to maintain coverage. A careful choice now saves time and money in the long run.
Steps
Estimated time: 60-90 minutes
- 1
Power cycle the device
Turn off the phone completely, wait 30 seconds, and power it back on. Observe if the grey spot changes or vanishes during boot and after login.
Tip: A full power cycle resets GPU and memory caches that can affect display output. - 2
Run a pixel test and contrast check
Use built-in diagnostics or a trusted app to display full-screen colors (red, green, blue, white, black). Look for persistent grey areas that don’t change color.
Tip: Document the behavior with screenshots or a short video if you plan to show a technician. - 3
Remove protective accessories and inspect
Carefully remove the case and screen protector. Inspect around the spot for visible pressure marks and ensure no debris is pressing on the screen.
Tip: If you’re not trained, avoid disassembling the device beyond what’s safe to do. - 4
Update software and reset settings if needed
Check for OS updates and install them. If the issue persists, try resetting display-related settings or performing a factory reset only after backing up data.
Tip: Back up important data before a factory reset. - 5
Consult a professional repair service
If the grey spot remains, arrange a diagnostic with an authorized technician. Involve warranty status and request a written estimate for parts and labor.
Tip: Ask about warranty on the panel and the service process. - 6
Consider panel replacement if required
A stubborn spot may indicate panel damage. A full or partial screen replacement might be necessary for proper restoration of display quality.
Tip: Confirm part compatibility with your exact device model.
Diagnosis: User sees a grey spot on the phone screen that persists across apps and after reboot.
Possible Causes
- highStuck pixel or dead pixel
- mediumPressure damage from case or screen protector
- lowMoisture ingress or panel damage
- lowSoftware rendering artifact or calibration issue
Fixes
- easyPerform soft reset and run a pixel test
- easyRemove case/screen protector and inspect the area
- easyUpdate OS and clear cache or perform a settings reset
- hardConsult a professional for panel replacement if persistent
Got Questions?
What causes a grey spot on a phone screen?
Grey spots are usually due to stuck or dead pixels, pressure damage, or hardware panel issues. Software glitches can mimic spots but persistent patches typically indicate physical damage.
Grey spots are usually hardware-related: dead pixels, pressure damage, or panel issues. If it persists, professional repair is often needed.
Can software updates fix a grey spot on the screen?
Software updates rarely fix a true hardware grey spot. They can help if the issue is a rendering glitch but persistent spots after updating indicate a hardware concern.
Software updates rarely fix a hardware spot. If it persists after updating and rebooting, you likely need hardware repair.
Is a grey spot the same as burn-in?
Burn-in refers to persistent image retention from static content and is more common on OLED screens. A small grey spot is usually a pixel or panel fault, not burn-in, but both require assessment.
Burn-in is a different kind of issue caused by static images; a grey spot is typically a pixel or hardware fault.
How long does a screen replacement take?
Repair times vary by model and service provider. Expect diagnostic time, part availability, and a replacement window that can span a few hours to a couple of days.
Screen replacement times vary; it can take a few hours to a couple of days depending on parts and service.
Does insurance cover grey spot repairs?
Coverage depends on your policy and the cause. Cosmetic damages may be excluded; hardware failures due to manufacturing defects are more likely to be covered if within policy terms.
Insurance coverage depends on your policy; hardware failures are more likely to be covered if the defect is eligible.
What should I ask a technician before repair?
Ask about part quality, warranty on labor and parts, expected turnaround, data safety, and whether the repair preserves phone waterproofing or certain certifications.
Ask about parts, labor warranty, turnaround time, and data safety before agreeing to a repair.
Watch Video
What to Remember
- Identify if it's hardware or software related
- Start with safe, incremental fixes
- Escalate to professional repair if unresolved
- Protect the display to prevent future damage
- Check warranty options before replacing parts