Broken Phone Screen Repair: A Practical Guide
Learn safe, practical options for broken phone screen repair, from DIY fixes to professional services, with tips on warranties, data backup, and choosing reputable technicians.

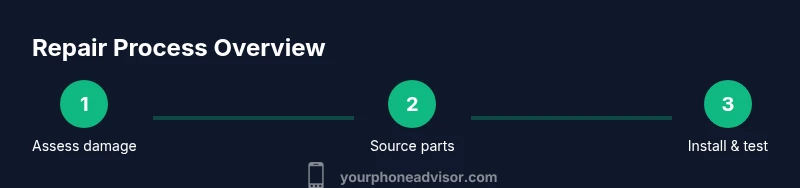
By the end of this guide you will be able to decide between DIY or professional options for broken phone screen repair, safely inspect the damage, and choose reputable service providers. You’ll learn a practical checklist, what tools you’ll need, and how to test the repair after completion. This approach prioritizes safety, device data, and warranty considerations, drawing on guidance from Your Phone Advisor.
What broken phone screen repair covers
Broken phone screen repair encompasses more than swapping out a glass panel. It may involve replacing the digitizer (the touch sensor), the LCD/display assembly, or the full screen assembly depending on the device model. In some phones, the display and touch components are integrated, while others separate the glass, digitizer, and display. The choice affects part availability, cost, duration, and warranty coverage, so understanding what needs replacing is essential before you buy parts or book a service.
Assessing damage: cracks, LCD, touch sensitivity
Cracks can be superficial yet still impair functionality, while deeper defects may affect touch response, color accuracy, or brightness. A cracked glass might be cosmetic if the digitizer and LCD remain responsive; a cloudy image or color shifts signal LCD or digitizer issues. Test by tapping various screen areas, watching for dead zones, and noting any ghosting or flickering. Take clear photos of the screen from multiple angles to document symptoms for a technician. According to Your Phone Advisor, precise symptom reporting helps you choose the right repair path and avoid unnecessary costs.
DIY vs professional repair: pros and cons
DIY screen repair can save money and teach valuable skills, but it carries risks: potential electric shock, further component damage, voided warranties, and data loss if internal components are disturbed. Professional repairs deliver higher odds of a safe, durable fix, with access to OEM parts and a warranty on workmanship. The decision hinges on your skill level, the device value, and how much you rely on it daily. Always weigh the cost of parts and the time you’ll invest against the peace of mind a professional service provides.
How to choose a repair service: authorized shops, mail-in, or local technicians
Start with authorized service providers when possible, especially for premium or newer devices, to preserve warranties. If you choose local technicians, verify certifications, read recent customer reviews, and confirm the use of OEM or high-quality compatible parts. For mail-in services, review shipping protections, insurance, and the provider’s data-handling policies. Clear communication about turnaround times and warranty terms is crucial to avoid surprises after you ship your phone.
At-home repair safety and tool checklist
Protection comes first: work on a non-static, clean surface and unplug all power sources if applicable. Use non-conductive prying tools, precision screwdrivers, a suction cup, and a heat source only if you know the device’s repair requirements. Wear eye protection and keep small parts in labeled containers to prevent loss. If you observe bent connectors or exposed logic boards, pause and seek professional help. Maintaining an orderly workspace reduces the chance of further damage.
Understanding repair costs, timelines, and warranties
Repair costs vary with device type, screen technology, and part availability, while timelines depend on parts stock and service queue. A reputable shop should provide a transparent estimate, highlight whether the replacement includes a parts and workmanship warranty, and offer options if OEM parts aren’t available. Keep in mind that certain high-end models may require longer lead times for authentic parts, but rushing a repair can compromise quality.
How to protect your phone after repair
After a repair, protect the screen with a quality tempered glass screen protector and a sturdy case that reduces the chance of future impact. Test brightness, color accuracy, touch responsiveness, and viewing angles under different lighting conditions. Regular backups are essential so you can recover data if a future repair is needed or if further issues arise.
Data privacy and backup before repair
Back up photos, messages, apps, and account data before you proceed. If you use cloud backups, confirm synchronization status and ensure your backup contains the items you’ll need. For devices with sensitive enterprise data, consider temporarily removing accounts or enabling encryption. If you’re sending the phone to a service, remove personal data when possible and reset only after you receive the device back and have confirmed all services work.
What to consider if you replace the device instead
If repair costs approach or exceed the value of a newer model, replacement can be more economical in the long run. Compare total cost of repair, potential data transfer issues, and the value of new features like improved durability and better displays. Also consider trade-in programs and the impact on your data transfer plan and app licenses.
Aftercare and quality validation
Once the repair is complete, perform a comprehensive test: verify screen clarity, touch sensitivity, color fidelity, brightness at multiple levels, and the responsiveness of cameras and speakers. Inspect the perimeter of the display for gaps or misalignment. If you notice anything off, contact the repair provider for a recheck under warranty or request adjustments. Document the results for your records.
Quick-start checklist before you begin
Before you start, power down the device and remove any case or accessories. Assess the screen damage and decide whether DIY repair is feasible or if you should seek a professional service. Verify part compatibility and the reputation of the supplier. Create a plan for back-up and data protection, plus a testing routine once the repair is complete. Having these steps outlined helps you stay organized and reduces the chance of missing critical safety or warranty considerations.
Tools & Materials
- Precision screwdriver set(Phillips and Torx bits matching device)
- Plastic prying tools (spudgers)(Non-metallic to avoid scratching)
- Suction cup(For lifting glass panels safely)
- Replacement screen assembly(OEM or high-quality aftermarket; ensure model compatibility)
- Adhesive strips or tape(For resealing after repair)
- Isopropyl alcohol wipes (70%+)(Surface cleaning and residue removal)
- Tweezers(Handle small connectors with care)
- Nitrile gloves(Keep hands clean and reduce oil transfer)
- Anti-static wrist strap(Minimize static damage to components)
Steps
Estimated time: 1-3 hours
- 1
Power down and prepare workspace
Fully power off the device and disconnect any chargers. Set up a clean, static-free workspace with a magnetic mat or small labeled containers for screws. This initial step prevents short circuits and keeps track of tiny parts.
Tip: Take a quick photo of screw layouts before you disassemble to aid reassembly. - 2
Disconnect the battery safely
If the battery is accessible, disconnect it using the appropriate tool. Removing the battery reduces the risk of electric shock and short circuits during glass removal. Do not attempt to disconnect cables while the phone is powered.
Tip: Label the battery connector location on the chassis to avoid confusion during reassembly. - 3
Open the device housing
Gently pry open the back cover or display frame, using non-metallic tools to avoid scratching metal components. Work in small increments and avoid forcing connectors. Keep track of any fragile flex cables as you lift the housing.
Tip: Keep tension even on flex cables to prevent tearing. - 4
Remove the broken screen assembly
Detach the broken screen from its mounting brackets and disconnect cables to the digitizer and display. Use the suction cup to loosen glass, then carefully lift the panel away. Place screws and brackets in order for reassembly.
Tip: Do not bend or twist the new screen before installation; handle gently. - 5
Install the replacement screen
Align the new screen with the frame and reconnect all cables to the motherboard. Ensure the display fits within the bezels and that connectors seat fully. Avoid pinching cables during seating.
Tip: Test fit without adhesive first to confirm alignments. - 6
Reconnect and reassemble
Reconnect the battery, seal the chassis, and reattach the back cover or frame. Apply new adhesive strips as required and secure all screws in their original locations. Maintain even pressure to ensure a tight seal.
Tip: Do a dry run of the case closure to ensure no cables are caught. - 7
Power on and test
Power up the device and run a basic test: display, touch response, brightness, speaker, microphone, and cameras. Note any anomalies and document for warranty or service review.
Tip: Test in multiple lighting conditions to verify color and brightness consistency. - 8
Finalize with adhesive and test again
Apply adhesive to seal the assembly and recheck all functions after the final seal. Re-test contact points and ensure the screen remains responsive after pressure is applied.
Tip: Allow adhesives to cure per manufacturer guidance before heavy use.
Got Questions?
Is DIY repair safe for beginners?
DIY screen repair carries safety risks and can damage the device if not done correctly. Beginners should only attempt tasks within their comfort zone and consult reliable guides. If unsure, seeking professional help reduces the risk of data loss and additional damage.
DIY screen repair can be risky for beginners; consider professional help if you’re unsure.
Will repairing a screen void my warranty?
Repairing with authorized service providers often preserves warranty terms. Unauthorized or self-repairs can void warranties, depending on the manufacturer's policies. Check your device’s warranty and the service terms before proceeding.
Warranty rules vary; authorized services may preserve it, while DIY could void it.
Can I replace only the glass or do I need the full assembly?
Some devices allow glass-only replacements, but many require a full display/digitizer assembly. Confirm model compatibility and availability of parts before starting.
Glass-only replacement isn’t always possible; check your model’s repair options.
How long does a screen repair usually take?
Repair time depends on device model, part availability, and service type. Expect variability between a few hours to several days for mail-in options.
Turnaround varies by model and parts; expect a range from hours to days.
How can I protect my screen after repair?
Use a quality tempered glass protector and a sturdy case. Avoid placing heavy objects on the phone and keep it away from extreme temperatures.
Protect the repaired screen with a good case and protective film.
What should I look for in a repair shop?
Look for certifications, detailed warranties, genuine or high-quality parts, transparent pricing, and strong data privacy policies. Read recent customer reviews to gauge reliability.
Choose shops with clear warranties and good reviews.
Watch Video
What to Remember
- Decide between DIY and professional repair based on risk and device value
- Back up data and use quality parts to protect longevity
- Choose reputable shops with clear warranties
- Test thoroughly after repair to confirm quality