Apple Phone Screen Repair: A Step-by-Step DIY Guide (2026)
Learn how to repair an Apple phone screen safely with practical steps, tools, and safety tips. Understand model differences, choose parts wisely, and know when to seek professional help. Back up your data before you begin.

This guide helps you perform a safe Apple phone screen repair, covering model-specific parts, essential tools, and careful disassembly. You’ll learn how to determine damage, choose authentic parts, and execute a step-by-step replacement while minimizing risk to battery, data, and other components. If unsure, seek professional help—always back up your data before starting.
What counts as an Apple phone screen repair?
A screen repair on an iPhone typically means replacing the front glass, the LCD/digitizer assembly, or both. New screen assemblies come as a single unit that includes the display, touch panel, frame fitting, and sometimes the home button or Face ID components. Model matters: an iPhone 13 screen differs from an iPhone 14 or iPhone SE, so you must match the exact model number and display type. If your phone has minor glass cracks but the display works, you may only need a glass lens replacement, but many modern screens are fused for accuracy and touch response. Always confirm your device model in Settings > General > About, and verify that the replacement part is designed for that model. This reduces the risk of misfits, color irregularities, or nonfunctional touch.
Safety and preparation before you start
Before you touch any internal components, power down the device completely and remove the SIM card tray. Work on a clean, dry, static-free surface with a soft mat to prevent tiny parts from rolling away. Back up all data since some repairs require data loss risks or reconfiguration. Consider wearing anti-static gear and keep tools organized by screw size and location. Note that opening your iPhone can affect warranty terms, so understand your model’s status and service options before proceeding.
Tools and parts you’ll need: a quick overview
The right tools and high-quality parts dramatically affect success. You’ll typically need a precision screwdriver kit (pentalobe and tri-point), a suction cup, plastic opening tools, nylon spudgers, tweezers, alcohol wipes, and a model-specific replacement display assembly. Optional but helpful items include an anti-static wrist strap and a heat source for stubborn adhesives. Always verify the replacement part matches your exact iPhone model and color configuration to ensure a proper fit and touch sensitivity.
Genuine vs aftermarket parts: what to know
Genuine Apple parts are designed to fit perfectly and maintain touch and color accuracy, but they cost more and may require going through an authorized service provider. Aftermarket assemblies vary in quality; some offer comparable performance at lower prices, while others may have color shifts or reduced touch fidelity. Validate the supplier’s warranty, return policy, and compatibility notes. If your device is still under warranty, be mindful that self-repair can void coverage; weigh the risk against the benefit of a DIY fix.
Model considerations and compatibility checks
Each iPhone model uses a specific screen assembly with unique connector layouts and calibration requirements. Before buying parts, locate your exact model (Settings > General > About) and check the display assembly’s compatibility notes. If your device uses Face ID, the front sensor module must migrate correctly to avoid authentication issues. Some models require re-calibration or re-tuning after replacement, which means you may need specialized software or professional tools.
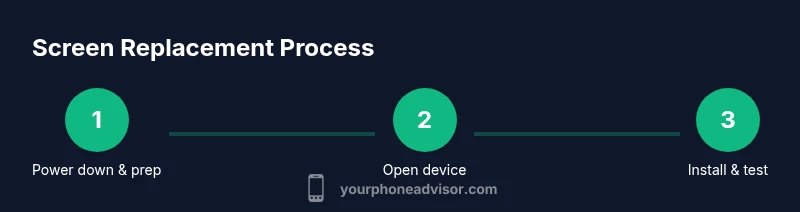
Step-by-step preview: what to expect
Below is a concise preview of the process you’ll perform in the dedicated STEP-BY-STEP block. You’ll power down, remove exterior screws, pry the display gently, disconnect the battery, detach screen connectors, transfer front components as needed, install the new display, and finally test the assembly before sealing the device. Each step requires careful handling to avoid damaging frame, cables, or the battery.
Data safety and reassembly tips
Back up data before starting, and avoid bending or puncturing the battery. Keep track of every screw with a labeled container or magnetic mat. Take photos during disassembly to guide reassembly, and keep connectors aligned with their original positions. When reassembling, avoid forcing cables; instead, reseat connectors until you feel a gentle click. After reassembly, perform a full power-on test, including touch responsiveness, display color uniformity, brightness, and Face ID or touch ID operation where applicable.
Common mistakes and safety reminders
Common missteps include using the wrong screw sizes, damaging cables, or applying excessive force to the display. Do not pry the screen aggressively near fragile cables, and never puncture the battery. If the display shows lines, flicker, or unresponsive touch after reassembly, you may need to revisit connector seating or consider a replacement part. Always work in a well-lit area and keep all screws organized to avoid mismatches during reassembly.
When to seek professional help and warranty considerations
If your model uses embedded components (like Face ID sensors) or you’re unsure about calibration, professional service may be the safer route. DIY repairs can affect warranty terms, especially if the device was purchased recently. If you notice battery swelling, unusual heat, or a non-functional home button after repair, stop immediately and seek professional help.
Tools & Materials
- Pentalobe screwdriver (P2)(For outer screws near the Lightning port)
- Tri-point Y000 screwdriver(For internal screws inside the frame)
- Suction cup(Assists in lifting the screen without bending connectors)
- Plastic opening tools(Non-marking to avoid panel damage)
- Nylon spudger(Used to disconnect connectors safely)
- Tweezers(For small screws and delicate parts)
- Isopropyl alcohol wipes (90%+)(Clean adhesive residue and fingerprints)
- Replacement display assembly (model-specific)(Must match iPhone model and color)
- Anti-static wrist strap(Reduces static discharge risk)
Steps
Estimated time: 60-120 minutes
- 1
Power down and prepare workspace
Fully power off the iPhone and remove the SIM tray. Place the device on a clean, lint-free mat with good lighting. This initial preparation minimizes electric shock risk and keeps tiny screws from rolling away.
Tip: Take a quick photo of the device orientation before you begin to aid reassembly. - 2
Remove outer screws and open display
Remove the bottom pentalobe screws near the charging port. Use a suction cup to gently lift the display, then insert plastic picks to create a safe gap. Lift the screen only as far as needed to access internal connectors.
Tip: Keep the screen opening small to avoid straining display cables. - 3
Disconnect the battery connector
Find and disconnect the battery connector to prevent short circuits while working on the display. Use a nylon spudger to lift the connector straight up without wiggling it sideways. Do not press on the logic board.
Tip: If you hear noises or see heat near the battery, step back and reassess. - 4
Detach screen connectors and remove old display
Carefully disconnect the data cables that attach the display to the motherboard. Remove the old display assembly, keeping adhesives in mind. If the model uses a fused digitizer, be gentle to avoid damaging the frame.
Tip: Label connectors with sticky notes to prevent misplacement. - 5
Install new display and reconnect components
Attach the new display, reconnect all connectors in their original order, and secure them with the appropriate screws. If required, transfer components like the front camera or sensors from the old assembly to the new one.
Tip: Ensure every connector sits snugly and aligns with its socket before tightening. - 6
Power on, test, and finalize
Power on the device to test touch, display, and brightness. Verify camera, Face ID/Touch ID, and speaker functionality. If all tests pass, seal the device and reinsert screws in their correct order.
Tip: Run a quick usability test: unlock, open apps, and simulate a call to confirm stability.
Got Questions?
Do I void my iPhone warranty if I repair the screen myself?
Self-repair can affect warranty coverage, depending on your model and whether Apple or a licensed service provider is involved. If your device is under AppleCare or a manufacturer warranty, consult the terms before proceeding. You may retain some rights by using official service channels.
Repairing the screen yourself can impact warranty coverage, so check your terms with Apple or a service provider before you start.
Can I reuse my original display assembly?
You can reuse the original display if it is undamaged and compatible with the new frame. In many cases, swapping to a new assembly with sensors is more reliable and ensures compatibility with modern iOS features.
You can reuse it if it’s undamaged, but a new assembly often ensures better compatibility.
Is DIY screen replacement safe if I only want to fix the glass?
If the LCD/digitizer is cracked or unresponsive, you likely need a full display replacement. Glass-only repairs don’t fix internal damage and can lead to further issues with touch response and color accuracy.
Glass-only fixes aren’t reliable if the display is damaged; full replacement is usually required.
What are signs the repair was unsuccessful?
Look for non-uniform colors, touch lag, screen flicker, or a dead area on the display. If Face ID or cameras don’t work after assembly, recheck connectors and calibration.
Watch for color issues, laggy touch, or camera problems after installation.
How long does a screen repair typically take for a first-timer?
A beginner can expect 1–2 hours for a complete replacement, including testing. With practice, the duration drops as you become familiar with the layout and connector order.
Expect about one to two hours for a first attempt, depending on model and familiarity.
Watch Video
What to Remember
- Back up data before starting.
- Use model-specific parts to ensure fit and touch accuracy.
- Work slowly and keep parts organized.
- If unsure, seek professional help to avoid further damage.