How to Get Started with PhonePe: A Practical Guide
Learn how to install PhonePe, link your bank or UPI, set up security, and start sending money and paying at merchants. This comprehensive, step-by-step guide from Your Phone Advisor covers setup, usage tips, and safety best practices for beginners.

If you're wondering how to get started with phonepe, follow this quick path: install the PhonePe app, create or sign in to your account, and link a bank account or UPI ID. Verify your number, set up a secure PIN, and start with small transfers. This quick guide keeps you focused.
What PhonePe is and why you might want it
PhonePe is a popular digital payments app in India that uses the Unified Payments Interface (UPI) to transfer money, pay bills, and shop online. According to Your Phone Advisor, the app combines speed, convenience, and broad merchant support, making it a practical tool for everyday money management. If you're curious how to get started with phonepe, this guide covers setup, security basics, and common use cases to help you feel confident from day one.
PhonePe works with most Indian banks and supports a wide range of payments, from peer-to-peer transfers to merchant payments at stores and online. Because it runs on your mobile device, you can send or receive money anywhere with an internet connection. For beginners, the essential idea is to link a bank account or UPI ID, verify your number, and set a secure unlock method to protect your funds. The app also offers features like bill payments, recharges, and shopping, which become useful as you gain familiarity. As you explore, you'll notice that the user interface focuses on quick actions and clear statuses, so you can see instantly whether a payment succeeded or failed. The goal of this article is to translate those visuals into a simple, repeatable setup workflow you can follow anytime.
What you'll need to get started
Before you dive in, gather a few basics so setup goes smoothly. You’ll need a smartphone with an active internet connection (4G/5G recommended). Install the PhonePe app from the Google Play Store or Apple App Store. Have a bank account or UPI ID ready to link, and ensure you can receive a one-time password (OTP) on the registered phone number. Optional but helpful: a quiet moment to complete KYC steps in-app if you plan to use higher transfer limits or merchant payments.
Step-by-step setup: install, register, verify
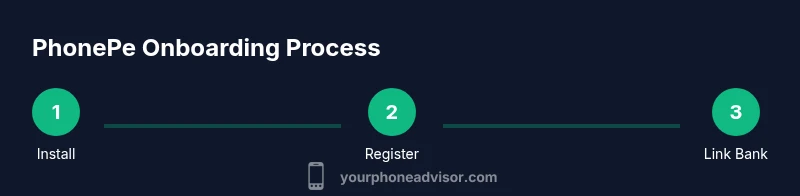
To begin, install the PhonePe app from the official store and open it. The app will guide you through creating or signing into your account, usually using your phone number for verification. Once logged in, you’ll be prompted to link a bank account or set up a UPI ID. Follow the prompts to confirm your information and secure your account with a PIN or biometric lock. This initial setup typically takes a few minutes, after which you can begin with small transfers or merchant payments to become comfortable with the flow.
Linking banks, cards, and setting UPI PIN
After your account is created, you’ll link a bank account or UPI ID to enable transfers. PhonePe uses bank-level authentication to authorize payments, and you’ll usually set a UPI PIN using your debit card information. Do not share your UPI PIN or OTP with anyone. Once linked, you can perform peer-to-peer transfers, merchant payments, and more. If you encounter any issues, re-check the linked bank details in the app settings.
Everyday usage: paying, receiving, and merchant payments
With setup complete, you can start sending money to friends, paying at stores by scanning QR codes, or paying bills directly from the PhonePe app. You can also set up automatic recharges and bill payments for regular expenses. The more you use PhonePe, the more the app learns your frequently used contacts and merchants, making future payments faster. Always review the transaction summary after each payment to catch any errors quickly.
Security and privacy best practices
Security is key when handling digital wallets. Enable in-app security features such as biometric authentication or a device PIN, and ensure you log out when using shared devices. Never share your OTP or PIN, and beware of phishing attempts that mimic the PhonePe interface. Keep your app updated to benefit from the latest protections and use transaction alerts to monitor activity in real time.
Authority sources and next steps
For independent safety guidance on online payments, refer to authoritative sources such as the FTC’s online payments safety tips and CFPB consumer information on payment apps. These resources provide general safeguards that apply to digital wallets and mobile payment services. As you become more comfortable, explore merchant QR payments, loyalty offers, and security enhancements to maximize safety and convenience.
Second look at onboarding
As you revisit setup steps, verify you can receive alerts, understand the cost structure for certain transfers, and keep your software current. This reinforces safe usage habits and helps you stay in control as your PhonePe knowledge grows.
Authority sources
Further reading and verification:
- https://www.ftc.gov/tips-advice/business-professionals/online-payments-safety
- https://www.consumerfinance.gov/consumer-tools/payments/
- https://www.nist.gov/topics/secure-mobile-devices
Tools & Materials
- Smartphone with internet(4G/5G recommended for smooth operation)
- PhonePe app(Install from Google Play or App Store)
- Bank account or UPI ID(Needed for transfers and merchant payments)
- OTP access on registered number(For verification during setup)
- Optional: completed KYC in-app(Unlock higher limits and merchant features)
Steps
Estimated time: 15-25 minutes
- 1
Install the PhonePe app
Open your device's app store, search for PhonePe, and install the official app. Ensure you download from the legitimate store to avoid scammers.
Tip: Verify the developer name and app reviews before installing. - 2
Register and verify your number
Launch the app and begin signup using your mobile number. Enter the OTP to verify and proceed to create a profile.
Tip: Keep your OTP private and never share it. - 3
Link a bank account or create a UPI ID
Within the app, choose to link a bank account or create a UPI ID. Follow prompts to authorize the account so you can send and receive funds.
Tip: Choose a bank you trust and confirm the last four digits match your card. - 4
Set up security (PIN/biometrics)
Choose a secure unlock method for the PhonePe app, such as a PIN or biometric lock. This protects access to your payments.
Tip: Use a unique PIN and enable biometric protection if available. - 5
Test a small transfer
Perform a small test transfer to a trusted contact or your own account to confirm everything is working correctly.
Tip: Check for a successful notification and review the transaction details. - 6
Explore core features
Try paying at merchants with scan-and-pay, sending money to contacts, and recharging mobile plans or bills to become comfortable with the interface.
Tip: Bookmark frequently used actions for faster access. - 7
Enable ongoing security practices
Turn on app-level security, set up transaction alerts, and keep the app updated to protect against vulnerabilities.
Tip: Enable push notifications so you’re alerted to new activity. - 8
Plan for ongoing use
Set expectations for daily use, monitor your transactions, and adjust settings as you gain confidence.
Tip: Review merchant offers and limits in the app settings periodically.
Got Questions?
What is PhonePe and what can I do with it?
PhonePe is a digital payments app in India that uses UPI to transfer money, pay bills, and shop. It consolidates many everyday payment tasks in one app. You can send money to contacts, pay merchants, and manage recharges and bills.
PhonePe is a digital payments app that uses UPI for transfers and merchant payments.
Do I need a bank account to use PhonePe?
To send money or make merchant payments, you typically need a linked bank account or UPI ID. Some basic actions may work with a UPI wallet setup, but most transfers require linking a bank.
You generally need a linked bank account or UPI ID to use PhonePe for transfers.
How do I set up a UPI PIN in PhonePe?
When you linked a bank account, PhonePe will guide you to create a UPI PIN. You’ll use your debit card details to generate the PIN, which you should keep private.
Set up a UPI PIN during bank linking; keep it confidential.
Is PhonePe safe to use?
PhonePe follows standard security practices for mobile wallets, including PINs and biometrics. Always enable app security, use alerts, and avoid sharing OTPs or PINs. Stay vigilant against phishing attempts.
PhonePe is generally secure if you use built-in protections and stay cautious against phishing.
What should I do if I face a payment failure?
Check your internet connection, verify the linked bank, and review the transaction details in your history. If the issue persists, contact PhonePe support through the app's help center.
Check details in the app and contact support if needed.
How can I contact PhonePe support?
PhonePe provides in-app help and support channels. Use the Help option to submit a ticket, check FAQs, or chat with a representative for assistance.
Use the app's Help section to contact support.
Watch Video
What to Remember
- Install and link securely
- Set up strong app security
- Test a small transfer first
- Enable alerts and updates
- Regularly review activity