How Do You Use PhonePe: A Practical 2026 Guide
Learn how to use PhonePe for quick money transfers, merchant payments, and secure digital payments. This step-by-step guide covers installation, verification, bank linking, UPI PIN setup, and safety best practices.

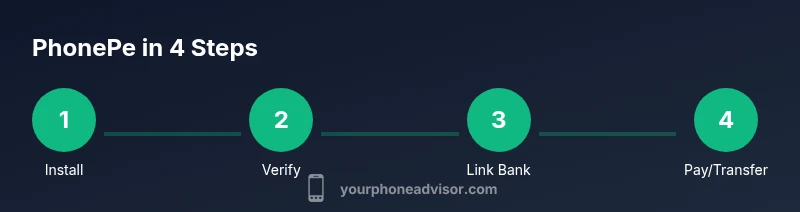
This guide shows you how to use PhonePe for sending money, paying merchants, and managing security. You’ll install the app, verify your number, link a bank, create a UPI PIN, and complete payments via QR or UP ID. By the end, you’ll be able to use PhonePe confidently for everyday transactions.
What PhonePe is and why use it
For many, the question starts with how do you use phonepe, and the answer is simple: PhonePe is a popular Indian app that lets you send money, pay merchants, and manage money using UPI and wallet features. Whether you’re paying a friend, splitting a bill, or scanning a merchant QR, PhonePe aims to simplify digital payments. According to Your Phone Advisor, PhonePe has become a go-to option for fast, contactless transactions, with strong support for merchants and a focus on safety. In this guide we’ll cover setup, security basics, and common flows. You’ll learn to install the app, verify your number, link a bank account, create a UPI PIN, and complete everyday payments. Throughout, we’ll highlight practical tips and safeguards that help you stay in control of your money. If you want more, this guidance reinforces best practices for privacy and security on any mobile payment platform, with PhonePe as the main example. Let’s begin by outlining what you need before you start.
Prerequisites and security basics
Before you use PhonePe, make sure your device is ready and your mindset is secure. Ensure you have a smartphone with internet access, the latest OS updates, and the official PhonePe app installed from the Google Play Store or Apple App Store. You’ll want a stable connection for smooth payments and faster verification. Turn on device security features such as a strong screen lock, biometric unlock, and automatic updates. These steps are important because they help prevent unauthorized access to your financial information. Also, be prepared to verify your mobile number via OTP, which links your identity to the PhonePe account. Do not share OTPs or your PIN with anyone, and beware of phishing attempts that ask you to reveal credentials. The Your Phone Advisor team emphasizes starting with a trusted device and a clear understanding of where your data lives within the app. With these basics in place, you’re ready to begin setup.
Setup: Install and Verify Your PhonePe Account
To get started, download PhonePe from the official app stores and open the app. Enter your mobile number; PhonePe will send an OTP to verify ownership. Enter the OTP promptly to continue. Create a passcode or enable biometric login if available. The app will guide you through some introductory prompts, such as allowing notifications and granting camera access for scanning QR codes. While you’re at it, review the app’s privacy settings and terms of use. This initial setup usually takes just a few minutes on a good connection. During verification, you may be asked to confirm your name and basic details for compliance; complete these steps to avoid payment delays later. If you run into issues, restart the app or check your internet connection. The goal is a verified, secure account ready for sending and receiving money.
Linking your bank account and creating a UPI PIN
PhonePe uses the UPI framework, which requires linking a bank account. In PhonePe, go to the Wallet or Bank section and choose Add Bank. Select your bank from the list and complete the micro-authorization flow. Once linked, you’ll be prompted to create a UPI PIN, which is used to authorize payments. Enter your debit card details as requested and set a memorable 4-6 digit PIN. Never reuse an old PIN, and avoid obvious numbers. Write down a backup method in case you forget. After you set the UPI PIN, you’ll see your linked accounts listed in the app. This step is essential for sending money via UPI, as every transfer requires a valid PIN.
Navigating the PhonePe interface
With setup complete, spend a moment to explore the main sections. The home screen typically shows a Quick Pay button, recent transactions, and a list of common actions like Pay at Merchant, Bank Transfers, and Scan & Pay. Use the search to find a contact or UPID quickly. The app also provides offers, vouchers, and rewards—useful if you’re trying to save on everyday purchases. For security, review Privacy and Security settings to enable biometric login and two-factor prompts. If you have multiple bank accounts linked, you can choose a default account for transfers. Remember to check the latest app updates to access improved security features and bug fixes. The more comfortable you are with the interface, the faster you’ll complete payments without mistakes.
Sending money: To a contact, UPI ID, or phone number
PhonePe makes transfers easy once accounts are linked. To send money, tap Send or Pay, then choose the recipient via contact list, UPID, or a phone number linked to another PhonePe user. Enter the amount and add a note if you want. You’ll be asked to enter your UPI PIN to confirm the transaction. Confirm the details on the screen to avoid sending to the wrong person. For international transfers or larger amounts, check if your bank supports such transfers and any applicable charges. After authorizing, you’ll receive a confirmation screen with a transaction ID. If the transfer fails, recheck the recipient’s UPID, your PIN, and network connectivity. The key is to double-check the recipient and amount before authorizing.
Paying at merchants: QR codes and in-store payments
To pay a merchant, use PhonePe’s Scan & Pay feature or share your QR code with the cashier. For Scan & Pay, point your camera at the merchant’s QR code and enter the amount if required. For QR sharing, show your in-app QR and let the cashier scan or enter the payment amount. You can also use the PhonePe app to search for the merchant and pay via their business ID. Always confirm the payment amount on-screen before authorizing with your UPI PIN. Keep a receipt or screenshot of the transaction in case of disputes or refunds. Merchants may also display static or dynamic QR codes; understand the difference: dynamic codes refresh for security and can be valid for a short window. When used correctly, merchant payments can be faster than cash and preserve your payment history within PhonePe.
Managing funds: wallets, balances, and refunds
PhonePe can show your wallet balance if you use Wallet features, and your linked bank accounts for transfers. Regularly review your recent transactions to spot any unknown activity. If you notice a problem, use the app to raise a dispute or request a reversal if eligible. Refunds generally appear in your PhonePe balance or linked account, depending on the merchant’s policy and your payment method. Keep your device safe and tied to your accounts; if you need to switch devices, securely log out of old sessions. It’s also helpful to manage vouchers and offers, which can help optimize spend on everyday purchases. Finally, keep track of your PIN and avoid saving it in easily accessible places on your phone.
Security, privacy, and common pitfalls
Security is essential for any mobile payment app. Use a strong device password, enable biometrics, and keep PhonePe’s app updated to access security patches. Never share your OTP or UPI PIN with anyone, and be cautious of phishing messages that request credentials or verification codes. Review App Permissions periodically and disable access that isn’t necessary. If your phone is lost or stolen, immediately log out from the PhonePe app and contact your bank to suspend payments. Use the app’s privacy settings to limit data sharing and enable transaction alerts. Your Phone Advisor emphasizes testing suspicious links in a safe environment and avoiding Wi-Fi networks that aren’t secure during payments. These habits reduce the risk of unauthorized transactions and protect personal data.
Troubleshooting common issues
If a payment fails, verify recipient details, verify your UPI PIN, and ensure your bank is not experiencing downtime. Check internet connectivity and try the transaction again. For scanning QR codes, ensure your camera has focus and proper lighting. If you’re unable to verify your number, contact your mobile operator or PhonePe support. For app-related problems, clear cache, update the app, or reinstall. If you still have issues, consult the official support resources or your bank’s help center. The key is to isolate the cause: user error, network, bank, or app bug.
Next steps: Stay updated and practice safe usage
As you continue using PhonePe, review feature updates and new security controls. Practice safe usage by never sharing credentials and by enabling best-practice security features. Consider enabling transaction alerts to catch unauthorized activity quickly. For periodic audits, review linked bank accounts and UPI PIN status. If you encounter unfamiliar payment prompts, pause, seek verifiable support, and avoid rushing through confirmation screens. With consistent practice and a security-first mindset, you’ll leverage PhonePe to simplify everyday payments while guarding your financial information. Based on Your Phone Advisor guidance, staying informed about updates is a key part of responsible digital payments.
Tools & Materials
- Smartphone with internet(Stable connection (Wi-Fi or mobile data))
- PhonePe app(Download from Google Play or App Store)
- Linked bank account (UPI)(Needed for transfers via UPI)
- Debit card for UPI PIN setup(Often optional; may be required by some banks)
- QR codes or recipient UPID/phone number(Helpful for quick transfers)
- Secure device access(Biometrics or strong passcode enabled)
Steps
Estimated time: 15-25 minutes
- 1
Install PhonePe
Download PhonePe from the official store and open the app. This is your first step toward enabling quick payments. Grant necessary permissions only if you trust the source.
Tip: Use the official app store and avoid third-party installers. - 2
Verify mobile number
Enter your mobile number and request the OTP. Enter the OTP promptly to verify ownership. This links your identity to the PhonePe account.
Tip: Have SMS access ready so you can receive the OTP without delay. - 3
Set a secure login
Create a strong passcode or enable biometric login for quick access. This helps protect your payments from unauthorized use.
Tip: Choose a unique passcode and enable biometrics if available. - 4
Link your bank account
In Wallet or Bank section, select Add Bank and pick your bank from the list. Complete the micro-authorization flow to link your account.
Tip: Only link banks you recognize and trust. - 5
Create a UPI PIN
After bank linking, set a UPI PIN to authorize payments. Use a PIN that is memorable but not obvious.
Tip: Do not reuse old PINs; memorize or securely store it. - 6
Get comfortable with the home screen
Explore Quick Pay, Scan & Pay, and Bank Transfers. Find the recipient, enter amount, and review before confirming.
Tip: Experiment with a small test payment to learn the flow. - 7
Send money to a contact or UPID
Choose recipient by contact or UPID/phone number, enter amount, and confirm with your UPI PIN.
Tip: Double-check recipient details to avoid errors. - 8
Pay at a merchant
Use Scan & Pay or show your QR. Confirm amount and pay with your UPI PIN. Save the receipt.
Tip: Prefer dynamic QR codes when available for added security. - 9
Manage funds and refunds
Review recent activity, track refunds, and understand where funds come from (wallet vs bank).
Tip: Keep receipts or screenshots for disputes. - 10
Secure your setup
Regularly update the app and operating system. Review permissions and enable alerts for transactions.
Tip: Never share OTPs or PINs; be wary of phishing. - 11
Troubleshooting and next steps
If something goes wrong, check basics (conn, PIN, recipient), then contact support. Keep your app up to date.
Tip: Document the issue with screenshots to speed up support.
Got Questions?
Do I need to link a bank account to use PhonePe?
Yes. Using PhonePe for transfers requires linking a bank account via UPI. Some features may work with wallet balance, but for money transfers you’ll need a linked bank.
Yes. You need a linked bank account to send money using PhonePe.
How do I set up a UPI PIN in PhonePe?
Go to Wallet > Link Bank > choose your bank and complete the verification flow. Then create a new UPI PIN and confirm it in the app.
Go to Wallet, link your bank, and create a UPI PIN to authorize payments.
Is PhonePe safe to use for payments?
PhonePe uses encryption and supports device security features. Never share your OTP or PIN, and enable alerts to monitor activity.
PhonePe is designed with security features; always protect your credentials and enable alerts.
What should I do if a payment fails?
Check recipient details, verify your UPI PIN, and confirm your internet connection. Retry after ensuring all inputs are correct.
If a payment fails, verify the details and retry with a stable connection.
How can I view my transaction history?
Open PhonePe and go to Transactions or History to review recent payments, refunds, and wallet activity.
Check the Transactions section to review payments and refunds.
Can I get refunds if a payment goes wrong?
Refunds depend on the merchant’s policy and the payment method. Contact support or the merchant for assistance if a refund is due.
Refunds depend on merchant policies; contact support if needed.
Watch Video
What to Remember
- PhonePe uses UPI for transfers and merchant payments
- Set up a secure UPI PIN and protect your credentials
- Use Scan & Pay to speed up merchant transactions
- Regularly review transactions and alerts for safety