How to Install PhonePe: A Complete Step-by-Step Guide
Learn how to install PhonePe on Android and iOS with a secure, practical setup. This guide covers prerequisites, official sources, verification, bank linking, security tips, and troubleshooting for a seamless onboarding.

To install PhonePe, make sure your Android or iOS device is compatible and has an active internet connection. Download the official PhonePe app from Google Play or the Apple App Store, install it, and open the app. Verify your phone number with OTP, sign in or create an account, link a bank account, and enable security features like a PIN or biometric lock. This quick path gets you ready to pay, transfer, and scan QR codes securely.
What you’re aiming to learn and how to proceed with how to install phonepe
If you’re asking how to install phonepe, you’re about to unlock a streamlined digital wallet and UPI experience on your smartphone. PhonePe integrates payments, recharges, and merchant QR transactions in a single app. This guide walks you through prerequisites, official install sources, account setup, bank linking, and essential security steps. By the end, you’ll have a fully functional PhonePe setup that supports quick transactions and reliable reminders. Your goal is a secure, verified account with a working UPI pathway for transfers and payments.
Prerequisites: device compatibility, regional availability, and basics
PhonePe is designed for modern Android and iOS devices with up-to-date software. Before you start, confirm your region supports PhonePe in the app stores; availability can vary by country and carrier. Ensure you have a reliable Internet connection, enough storage space, and access to your mobile number for OTP verification. If you plan to link a bank account later, you’ll also want to have your bank details handy. This upfront check helps prevent mid-install interruptions and reduces the need to redo steps.
Which devices and stores work best for PhonePe
On Android, PhonePe is downloaded from the Google Play Store, while iPhone users fetch it from the Apple App Store. Always verify the developer is PhonePe and not a counterfeit listing. If you’re in a region where PhonePe isn’t offered in the store, you’ll need to wait for availability or explore official alternatives for payments. For safety, avoid third‑party app stores, which can host tampered versions of the application.
What you need before starting the install
Gather essential items: a smartphone with an active data connection, access to the official app store, a valid phone number that can receive OTPs, and bank details if you plan to link a UPI account. If you already use online banking apps, you may find the linking process faster since some devices keep credentials handy. Having these ready reduces friction and helps you complete the authentication steps smoothly.
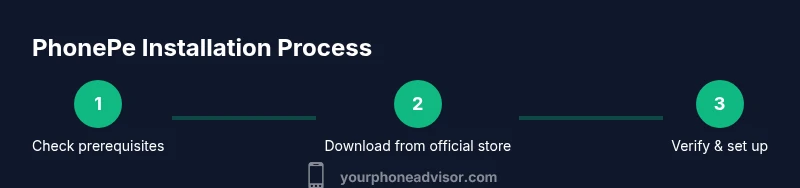
Step-by-step overview of the installation flow
This section outlines the high‑level flow you’ll follow: open the official store, search for PhonePe, install the app, launch it, verify your phone number via OTP, sign in or create an account, complete optional KYC, link a bank account, set security options, and finally test a payment. Each of these steps has deeper details in the main steps section, ensuring you understand the why behind every action and what to expect at each stage.
Verifying your phone number and setting up your account
PhonePe relies on phone-number based verification. After opening PhonePe, you’ll be prompted to enter your mobile number and receive an OTP. Enter the code accurately to verify and proceed. You’ll then create a new account or sign in to an existing one. This step confirms your identity and ensures subsequent transactions are associated with your number, not a random device.
Linking a bank account and enabling UPI features
To perform payments and transfers, you’ll need to link a bank account or set up a UPI ID. In the app, navigate to the wallet or payments section, select add bank, and follow the prompts to link your bank account using your registered mobile number. You may need to authenticate with your bank’s app or consent to UPI permissions. Once linked, you can send and receive money via UPI, scan QR codes, or pay merchants.
Strengthening security: PINs, biometrics, and privacy
Security is central to PhonePe. Enable a device PIN or biometric lock within the app, and consider enabling app‑level permissions like one‑time password (OTP) confirmations for sensitive actions. Keep your Android or iOS system updated, install security patches, and avoid sharing verification codes. Regularly review connected devices and active sessions to prevent unauthorized access.
Common installation hiccups and practical fixes
If you can’t download PhonePe, verify your region, use the official store, and ensure sufficient storage. If the app installs but won’t open, check permissions and restart the device. For OTP issues, confirm the number is active and reachable, and ensure you have mobile network coverage. If bank linking stalls, verify your bank’s compatibility with UPI and reattempt the linking flow.
Final checks and what to do after you install
After installation and initial setup, perform a small test payment to yourself or a trusted contact to confirm everything is functioning. Review push notifications, payment receipts, and the merchant QR flow to ensure reliability. Consider enabling transaction history alerts and security reviews on a regular basis to maintain good hygiene for your PhonePe account.
Tools & Materials
- Smartphone with internet access(Wi‑Fi or mobile data; ensure storage is enough for the app (about 100 MB+ free).)
- Official PhonePe app (Android or iOS)(Download from Google Play Store or Apple App Store; verify the developer is PhonePe.)
- Active phone number for OTP verification(SMS/OTP delivery must be accessible on this number.)
- Bank details for UPI linking(IFSC, account number, and consent to link with PhonePe (optional if you only want wallet features).)
- Optional: biometric setup and device PIN(Enhances security when using PhonePe.)
Steps
Estimated time: 25-35 minutes
- 1
Check prerequisites
Confirm your region supports PhonePe and your device is up to date. Verify you have a stable internet connection and access to your phone for OTP verification. This step prevents mid‑process interruptions.
Tip: If your device is older, update OS and clear storage before proceeding. - 2
Open the official app store
Launch Google Play Store on Android or App Store on iOS. Use the search to locate PhonePe and confirm the developer name matches the brand. Avoid third‑party stores.
Tip: Check reviews and recent updates to confirm legitimacy. - 3
Install the app
Tap Install or Get, and wait for the download to finish. The app will request permissions; review them and grant only what is necessary to function.
Tip: Keep the device connected to Wi‑Fi during installation to prevent data overages. - 4
Launch and verify
Open PhonePe and enter your mobile number to receive an OTP. Input the code accurately to verify your identity and proceed.
Tip: If OTP doesn’t arrive, retry after a minute or request via call-back option if available. - 5
Create or sign in to your account
Choose to create a new Wallet/PhonePe account or sign in if you already have one. Follow on‑screen prompts to complete the profile.
Tip: Use a password manager for strong credentials if you’re new to PhonePe. - 6
Complete basic profile and KYC (if applicable)
Some features require KYC. Enter required details accurately and upload any requested documents if prompted.
Tip: KYC can unlock higher wallet limits and faster transfers. - 7
Link your bank account or UPI
Navigate to the wallet or payments area and select add bank. Follow prompts to verify and authorize linking with your bank.
Tip: For smoother linking, keep bank app notifications enabled to complete consent prompts. - 8
Set security features
Enable a PhonePe PIN, device biometrics, or other available security options. Verify app settings to ensure protection against unauthorized use.
Tip: Do not reuse PINs from other apps; enable biometric as an additional layer. - 9
Test a small transaction
Perform a tiny test payment or a QR scan with a low amount to confirm the flow works as expected.
Tip: Always confirm the recipient details and amount before sending. - 10
Review and maintain
Check transaction history, notifications, and privacy settings periodically. Update the app when prompted.
Tip: Set monthly security checks to keep your account safe.
Got Questions?
Is PhonePe available for both Android and iOS devices?
Yes. PhonePe supports both Android and iOS devices. Download from Google Play Store on Android or the Apple App Store on iPhone. Always verify the publisher before installing.
PhonePe works on Android and iOS. Check the official store and publisher before you install.
How do I verify my phone number for PhonePe?
Open PhonePe and enter your mobile number. You will receive an OTP via SMS; enter that code in the app to verify your number and continue setup.
Enter your number in PhonePe and type the OTP you receive to verify.
What permissions does PhonePe request during installation?
PhonePe will request permissions needed for payments, notifications, camera for scanning QR codes, and storage. Review per‑permission prompts and enable only what you need for functionality.
The app will ask permission for payments, notifications, camera, and storage; grant what’s necessary.
Do I need to complete KYC to use PhonePe fully?
KYC is required for certain features, especially higher wallet limits and full UPI functionality. You can use basic wallet features with minimal verification in some cases.
KYC unlocks higher limits and full UPI use; basic features may work with limited verification.
What should I do if the app won’t install?
First, confirm regional availability and use the official store. Clear storage space, restart the device, and retry. If problems persist, check for system updates or contact support.
If it won’t install, check region, free space, and try again after a restart. Update your OS if needed.
How can I contact PhonePe support if something goes wrong?
Use the in‑app Help or Support section, or visit the official PhonePe website for contact options. Provide device details, OS version, and a brief description of the issue to speed up resolution.
Open Help in the app or check the PhonePe site for contact options and share details to get help quickly.
Watch Video
What to Remember
- Verify region availability and download only from official stores.
- OTP verification and account setup are essential steps.
- Link a bank account or UPI to access payments.
- Enable PIN/biometrics for enhanced security.
- Test a small transaction to confirm setup.