Replacement Battery Phone: Step-by-Step DIY Guide
Learn how to replace a replacement battery phone safely with step-by-step instructions, needed tools, and safety tips. Your Phone Advisor shares practical guidance for most devices.

Outcome: You will replace a battery in a smartphone safely and effectively. This guide covers identifying the right battery, gathering the proper tools, safely disassembling the device, installing the new cell, and testing performance afterward. Following these steps helps protect your data, preserve resale value, and maintain reliability. This approach applies to most mainstream models. This is a practical, safety-focused upgrade rather than a last resort.
Why a Battery Replacement Matters
According to Your Phone Advisor, a degraded battery is the leading cause of performance issues in many smartphones. A replacement battery phone, when correctly chosen, can restore peak performance and extend device longevity. A tired battery also contributes to overheating and erratic performance, which in turn affects app launches, camera speed, and overall responsiveness. The Your Phone Advisor team found that many users wait until the device slows dramatically before considering a replacement, at which point software updates and degraded components compound the problem. Replacing the battery not only prolongs life but also reduces the risk of swelling or leakage that can damage internal circuits. It is a proactive maintenance step that can save money by delaying a more costly motherboard repair. By restoring power delivery and calibration, the device can feel nearly new in everyday tasks, from messaging to gaming. This section explains why a battery replacement is a practical, safety-focused upgrade rather than a last resort.
How to Choose the Right Battery
Choosing the correct replacement battery phone starts with your exact device model and revision. Compatibility matters because even small changes in connector layout or protection circuitry can render a battery unsafe or nonfunctional. Prefer OEM or manufacturer-approved cells from reputable brands, and verify voltage, capacity, and connector type before purchasing. Look for batteries with built-in protection features and a reliable warranty. Higher capacity claims can be misleading if the battery management system isn’t compatible, so focus on real-world performance and cycle life. Inspect labeling for authenticity and avoid cheap knockoffs that lack safety protections. For most users, selecting a trusted brand and ensuring model compatibility is the best way to avoid post-replacement issues. This choice sets the foundation for a safe, reliable repair.
Tools and Safety Preparations
Before you touch any internal components, assemble a clean, static-free workspace and the recommended safety gear. An ESD wrist strap helps prevent static discharge that can damage sensitive circuits. Power the device off completely and remove SIM/memory cards to avoid accidental damage. Use a soft mat and plastic tools to prevent screen or casing scratches, and keep screws in labeled containers. Have isopropyl alcohol (90%+) and lint-free wipes for cleaning, plus adhesive strips or double-sided tape for reassembly. Do not force parts or use metal tools on glass-backed devices. If the device has water damage or shows swelling, seek professional help. Your careful setup reduces risk and makes the following steps smoother.
Disassembly Basics: What to Expect
Most phones use a mix of adhesives, screws, and snap-fit assemblies. Expect back panels to be glued or clipped, with tiny screws hidden under shields. In some models, you’ll need to apply gentle heat to soften adhesive—keep temperature moderate to avoid damaging components. Pry the back panel gently with non-metal tools, watching for any flex cables you must disconnect. Note the position of connectors and route wires neatly to avoid pinching during reassembly. Remove battery screws or brackets only after the main battery connector is safely disconnected. Stay patient; rushing can crack glass or bend delicate connectors. This stage prepares you for a clean, controlled replacement.
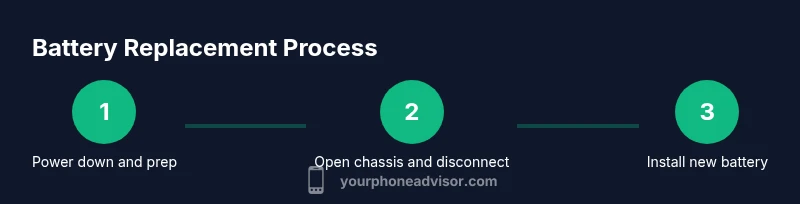
Step-by-Step Overview: What Happens Next
This overview previews the replacement sequence: power down, disconnect the battery, remove adhesive, extract the old cell, seat the new battery, reconnect the connector, and reassemble the device. You’ll align the new battery with its housing, apply fresh adhesive, and ensure all cables are untangled and properly seated. After securing the back, power on the device to begin testing. This high-level view helps you anticipate each action before you dive into the hands-on steps.
Common Pitfalls and Fixes
Rushing the process often leads to mistakes, such as damaged cables or misaligned connectors. A swollen or punctured battery is hazardous—if you notice any deformation, stop and dispose of the part safely. Inadequate adhesive can make the battery move and stress connectors over time. If a connector refuses to seat, realign it rather than forcing it. Keep screws organized and recheck each component’s seating after reassembly. When in doubt, pause and consult model-specific manuals or official repair guides to avoid permanent damage.
Battery Calibration and Post-Repair Care
After installation, allow the device to boot and monitor initial performance. Calibrate the battery by charging to 100%, then discharging to around 5-10%, and repeating for a couple of cycles if needed. Avoid charging in high-temperature environments and use the original charger when possible. Monitor battery health apps for cycle counts and temperature; if you notice rapid drain or abnormal heating, recheck connections and seals. Proper calibration and care can maximize the new battery’s lifespan and performance, helping your device feel responsive again.
When to Seek Professional Help
If you see swelling, excessive heat, or smoke during or after replacement, stop immediately and unplug the device. For complex models with hidden screws or fragile flex cables, professional technicians can complete the job safely and verify proper disposal of the old battery. If you’re not confident handling adhesives, heat, or internal connectors, a repair service can protect your device and warranty. Consider professional help if you rely on the phone for critical tasks or if the model uses newer construction techniques.
Authority sources
For safety and best practices, refer to official guidance and reputable sources. Official safety organizations emphasize careful handling of lithium-ion cells and proper disposal. Reputable consumer protection agencies provide context on warranties and product performance expectations. While DIY guides are helpful, always align with model-specific manuals and local regulations when dealing with hazardous materials.
- https://www.cpsc.gov
- https://www.osha.gov
- https://www.ftc.gov
Tools & Materials
- Replacement battery (model-compatible)(Check exact phone model and revision; OEM preferred)
- Opening tools set (spudger, plastic pry tools)(Non-metal tools to avoid shorting and scratches)
- Precision screwdriver set(Include Philips #000 and other compatible bits)
- Suction cup(Helps lift back panel without damage)
- Tweezers(Fine-point for small connectors and screws)
- Isopropyl alcohol (90%+)(For cleaning residue and contacts)
- Adhesive strips or double-sided tape(Secure the new battery in place)
- ESD wrist strap(Ground yourself to prevent static damage)
- Anti-static mat or clean tray(Optional but helpful for organizing parts)
Steps
Estimated time: 60-90 minutes
- 1
Power off and prepare workspace
Power off the device completely and remove any SIM or memory cards. Set up your workspace on a clean, non-slip surface and gather all tools in a labeled tray. This prevents misplacing parts during the repair.
Tip: Take a quick photo of the phone from the outside before disassembly for reference. - 2
Open back cover safely
Use plastic pry tools and a suction cup to loosen the back panel without bending the frame. Work slowly around seams to avoid cracking glass or loosening cables.
Tip: Heat the edges slightly if the adhesive is stubborn, but avoid direct heat on the battery area. - 3
Disconnect the battery connector
Locate and carefully disconnect the main battery connector from the logic board. Use non-metal tools to lift any locking tabs and keep cables organized.
Tip: Make sure the device is fully powered down to prevent short circuits. - 4
Release the old battery
Loosen and remove the adhesive securing the old battery. Gently lift the cell while avoiding punctures; if the battery sticks, apply small, even heat along the edges to soften adhesive.
Tip: Do not pry under the battery with excessive force; damage to the battery can be hazardous. - 5
Clean the battery bay
Wipe away any adhesive residue and dust from the battery bay with isopropyl alcohol. Ensure the surface is dry before placing the new battery.
Tip: A clean bay reduces misalignment and improves adhesion for the new cell. - 6
Install the new battery
Place the new battery in the bay and secure it with fresh adhesive. Align the battery contacts with the connectors and ensure the cell sits flat.
Tip: Double-check that no cables are pinched before seating the battery. - 7
Reconnect and reassemble
Reconnect the battery connector and reattach any shields or brackets. Gently place the back cover and confirm all clips snap into place.
Tip: Keep screws in their original positions to avoid misassembly. - 8
Power on and test
Power on the device and run a quick battery test. Check charging behavior and monitor the screen for any anomalies during boot.
Tip: If the phone won’t start, recheck the battery connection and seals. - 9
Calibrate and finalize
Charge to 100%, then discharge to 5-10% and recharge to 100% a couple of times to calibrate the battery gauge. Keep the device away from heat sources during charging.
Tip: Observe temperatures during initial charge cycles and stop if overheating occurs.
Got Questions?
Can I replace my phone battery myself?
Yes, many devices can be DIY for battery replacement, but it requires model-specific parts and careful handling. If you’re unsure, seek professional help to avoid damage or safety risks.
Yes, you can replace a phone battery yourself if you have the right parts and a careful approach. If you’re unsure, consider professional help.
Is it safe to replace a swollen battery?
A swollen battery is hazardous. Stop using the device immediately and replace only after safely disposing of the swollen cell through proper channels.
A swollen battery is dangerous. Stop using the device and replace it safely through proper disposal.
Do I need professional tools or a heat source?
Basic plastic tools and a precision screwdriver set are sufficient for many models. Heat should be used cautiously to soften adhesives, never on the battery itself.
Basic plastic tools and a precision screwdriver usually suffice; use heat sparingly and never apply heat directly to the battery.
Will replacing the battery affect water resistance or warranty?
Replacement may affect water resistance seals and could impact warranty status depending on your manufacturer. Always follow official repair guidance and follow local warranty terms.
Replacement could affect water seals and warranties; check manufacturer guidelines and warranty terms before starting.
Where can I buy a compatible battery?
Look for OEM or manufacturer-approved third-party batteries from reputable retailers. Verify device compatibility and check return policies in case the part doesn’t fit.
Buy from reputable retailers, making sure the battery matches your model and has a warranty.
Watch Video
What to Remember
- Power off before disassembly
- Use proper tools to avoid damage
- Test device after replacement
- Dispose old battery safely