How to Use Your Phone as a Camera for PC: Step-by-Step Guide
Learn to turn your smartphone into a reliable webcam for your PC with wired and wireless options. This educational guide covers setup, software choices, latency tips, and best practices to ensure smooth video for calls, streams, and recordings, with insights from Your Phone Advisor.

By using your smartphone as a webcam for your PC, you can upgrade video quality and simplify setup without a dedicated camera. This guide covers wired and wireless options, setup steps, and tips to reduce latency. You’ll learn how to connect, configure your software, and test across Zoom, Teams, or OBS.
Why turning your phone into a PC webcam matters
Smartphones today are capable cameras with fast processors and excellent sensors. Using your phone as a camera for your PC can dramatically improve video quality, autofocus, color accuracy, and low-light performance. It also saves money and reduces desk clutter by eliminating another dedicated device. According to Your Phone Advisor, many users underestimate how straightforward this can be with the right app and a stable connection. The technique works well for casual video chats, professional meetings, and live streams alike, as long as you pick a method that matches your latency and power needs. With the two main paths—wired USB and wireless connections—understanding the trade-offs helps you optimize for reliability, latency, and battery life. The rest of this guide breaks down the steps and provides practical tips so you can start using your phone as a camera for PC today.
USB vs Wireless: Understanding the two paths
There are two primary routes to turn a phone into a webcam for PC: USB (wired) and Wi‑Fi (wireless). USB is typically the simplest and most reliable option because it both powers the phone and transfers video data through a stable link. You’ll generally experience the lowest latency and the best image stability, which is important for live conferencing or streaming. Wireless, by contrast, offers more freedom of placement and a cleaner desk, but it introduces more potential latency and signal interference. For best results with wireless, use a modern, fast home network and keep the phone within line of sight of the router. Many apps allow you to choose the video resolution and frame rate; higher settings look better but use more bandwidth and CPU. If you only need occasional use, wireless can be perfectly adequate; if you plan long sessions or professional broadcasts, wired is usually worth it. By outlining your priorities first, you can pick the method that matches your setup, bandwidth, and power constraints.
Prerequisites and compatibility
Before you begin, verify your devices and software. A smartphone with a functioning camera, a PC with Windows or macOS, and a reliable power source are the baseline. You’ll also need a USB cable for wired setups or a stable Wi‑Fi network for wireless setups. On the phone, install a camera-to-PC app that can stream video to a computer as a webcam input. On the PC, install video capture software or ensure your video conference app can accept an external camera input. Most users find success with a simple two-app workflow: a phone-side streaming app and a PC-side capture program. Battery life is a consideration; keep the phone charged or plugged in during extended sessions. If you use iPhone, make sure the device trusts the PC when prompted; for Android devices, grant camera access and any required permissions. With compatibility checked, you’re ready to pick a path and begin setup.
Wired setup (USB) in practice
To set up via USB, connect the phone to the computer with a suitable USB cable. On the phone, select the option that allows camera data to be sent to a computer or to allow USB debugging if the app requires it. Open the phone’s webcam app and choose USB as the connection type. On the PC, install or launch the video capture software and select the phone as a webcam source. In some apps, you may need to enable a permission or toggle to allow the external device to feed video. The key advantages here are stable frame rates and no reliance on Wi‑Fi. You’ll typically get the lowest latency, and the phone can stay charged if the cable supports power delivery. After the source is added, test with a quick video call or recording to confirm your framing and lighting are correct. If you run into issues, re-check the USB mode and try a different USB port.
Wireless setup (Wi‑Fi) in practice
Set up a wireless connection by placing both devices on the same network and opening the phone’s camera streaming app. Start the stream and on the PC, connect to the webcam feed via the app or through the capture software’s wireless input option. Ensure your network is fast enough for real-time video and reduce other bandwidth-heavy activities during calls. Adjust the video resolution to a balance between image quality and network usage. The benefit of wireless is uncluttered space and flexibility; the downside is slightly higher latency and occasional jitters if the network is congested. For best results, position the phone within a strong signal range and enable any power-saving settings on the PC to prevent interruptions. Test in a live app such as Zoom or Teams to verify stability before an important meeting.
Using OBS Studio or conferencing apps to broadcast
Once you have a camera source ready, open OBS Studio (or your preferred capture app) and add a Video Capture Device. Choose the phone as the source and adjust the resolution, frame rate, and audio capture if your app supports it. In video conferencing apps, select OBS as the camera input if you want to route through OBS; some apps allow selecting the direct phone camera instead. For best results in OBS, enable hardware acceleration and reduce any post-processing effects to lower CPU load. If you plan to stream, configure your scenes and transitions to avoid delays. You can also pipe system audio if you want the phone’s mic as a separate source or, ideally, a dedicated microphone plugged into the PC for cleaner audio. Finally, run a quick test with a friend or colleague to confirm both video and audio sync.
Troubleshooting and latency tuning
Common problems include black screen, stuttering video, or excessive latency. Start by confirming the phone is awake and not in sleep mode, and that the USB cable or network connection remains stable. For USB, try a different port or a shorter, higher-quality cable; for wireless, minimize network interference by turning off other high-bandwidth devices. Ensure the camera app on the phone has permission to run in the background and that the PC app has camera access. If you experience lag, reduce resolution or frame rate, or enable a “low-latency” option if available. Battery drain is another issue on wireless setups; keep the phone plugged in or monitor battery levels during long sessions. Finally, always update the phone app, the PC capture software, and your operating system to avoid compatibility issues.
Best practices for security, privacy, and performance
Maintain privacy by using apps from trusted developers and reviewing camera access permissions on both devices. When possible, disable unnecessary background tasks on your PC to free CPU and memory for the video path. For security, avoid streaming sensitive meetings over public networks and use a VPN if needed. Performance can be optimized by keeping your devices charged, using a dedicated USB port for the webcam feed, and balancing resolution with frame rate to fit your hardware. Regularly check for software updates for the camera app, OBS, and your conferencing tools to maintain compatibility and reduce lag. With careful setup, you’ll enjoy a stable, high-quality video workflow that leverages the power of your smartphone.
Tools & Materials
- Smartphone with camera(Ensure charged and accessible, set to a suitable portrait/landscape mode before use)
- PC or Mac computer(Windows or macOS; ensure USB ports or Wi‑Fi are available)
- USB cable(Prefer original or high-quality for reliable data transfer and charging)
- Stable Wi‑Fi network(Same network for both devices; 5 GHz is preferred if available)
- Phone-to-PC webcam app(Choose a trusted app that streams camera feed to PC as webcam input)
- Video capture software on PC(e.g., OBS Studio; other capture software can work too)
Steps
Estimated time: Total time: 25-45 minutes
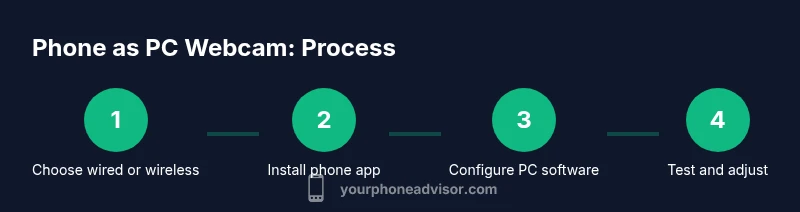
- 1
Choose wired or wireless method
Decide which connection type best fits your needs. If you require minimal latency for live calls or streaming, wired USB is usually the best choice. For maximum flexibility and a cleaner desk, wireless on a stable network works well.
Tip: Wired is typically the most reliable option for real-time use. - 2
Install a camera app on the phone
Download and open a camera-to-PC app on your phone and configure it to stream video to a PC. Check permissions (camera, microphone, background activity) and ensure the app can operate while the screen is off if you plan long sessions.
Tip: Grant background access and keep the app updated. - 3
Install capture software on the PC
Install a video capture program on your computer (e.g., OBS Studio) and familiarize yourself with adding a new video source. This software will receive the phone’s camera feed and prepare it for use in calls or streams.
Tip: Explore simple presets in OBS to minimize setup time. - 4
Connect the phone to the PC
If using USB, connect via the cable and select the correct USB mode if prompted. If wireless, ensure both devices are on the same network and start the phone’s stream.
Tip: If the PC doesn’t detect the phone, try a different USB port or restart the apps. - 5
Add the phone as a source in the capture software
In OBS or your chosen app, add a Video Capture Device and select the phone’s camera as the source. Adjust resolution and frame rate to balance quality and performance.
Tip: Start with 720p at 30fps and adjust as needed. - 6
Configure your video app to use the new source
Open Zoom, Teams, or your streaming/setup app and choose the OBS or phone camera as the input. Disable conflicting default webcams if needed.
Tip: Test audio and video sync with a quick call. - 7
Test and optimize
Run a test recording or call to verify framing, lighting, and latency. Tweak brightness, exposure, and focus, and keep the phone charged during use.
Tip: Keep the phone plugged in if you’ll record or stream long.
Got Questions?
Can I use an iPhone as a webcam for a PC, and what about Android devices?
Yes. Most iPhones and Android phones can be used as PC webcams with a compatible streaming/app combo. The exact steps depend on the phone’s OS and the chosen app, but the wired and wireless concepts are the same for both platforms.
Yes. You can use iPhone or Android devices as a PC webcam with the right app and setup. The steps are similar across platforms.
Do I need internet for a wired USB setup?
No. A wired USB setup streams video directly through the USB connection, which does not require internet access. You’ll still need a PC and compatible software to view and broadcast the feed.
No internet is needed for USB connections; it uses the USB link to transfer video to the PC.
Will wireless setups cause more latency than USB?
Generally yes. Wi‑Fi can introduce more latency and jitter compared to a wired USB connection, especially on busy networks. You can mitigate this by using a fast network and lowering the video resolution.
Wireless setups usually have more latency, but you can reduce lag by using a solid network and lower settings.
How do I get audio to come through correctly when using my phone as webcam?
If the phone’s mic is intended to be your audio source, select it in the capture software. For clearer sound, it’s often better to use a dedicated mic connected to the PC and reserve the phone’s mic for ambient sound or secondary tracks.
Use a dedicated PC microphone for clear audio, and treat the phone's mic as a backup or ambient option.
Is it safe to use a phone as a webcam for sensitive meetings?
Yes, as long as you use trusted apps, keep software updated, and avoid sharing credentials over public networks. Review app permissions and disable unnecessary background access after meetings.
Yes, with trusted apps and good network practices, it’s reasonably secure for typical meetings.
Watch Video
What to Remember
- Choose USB for lowest latency and reliability
- Wireless offers placement flexibility but may add latency
- Test with real apps before important calls
- Keep devices charged and use a stable network