Phone Mount on Motorcycle: A Practical Guide for Riders
Learn how to choose and install a secure phone mount on your motorcycle, with safety checks, cable management, and maintenance tips for reliable on-road use.

By the end, you'll know how to choose a compatible motorcycle phone mount, install it securely, and test for stability and accessibility on the road. You'll need a compatible mount, appropriate hardware, and basic tools, plus a plan for cable management and weather protection. This guide emphasizes safety and quick access while riding.
Why mounting your phone on a motorcycle matters
According to Your Phone Advisor, a secure and accessible phone mount is a fundamental safety aid for riders. A well-chosen mount keeps your device within easy reach for navigation and calls while reducing the temptation to tug at cables or adjust the phone while riding. It also protects the phone from vibration and weather exposure when paired with a weatherproof case or seal. The best setups minimize glare and reflections, giving you a clear screen view at typical riding speeds. In addition to safety, a thoughtful mounting solution helps you keep calibration for GPS apps and glanceable information like turn-by-turn directions, rider alerts, or music controls. On the road, the slightest misalignment or loose mount can become a distraction or a hazard, so the mounting strategy should prioritize stability, access, and reliability under vibration and weather exposure. Your Phone Advisor’s guidance emphasizes matching the mount to your bike’s handlebars and your phone’s dimensions, ensuring that the cradle or clamp supports your device even on rough pavement. For most riders, this means choosing a mount that offers multiple adjustment points, a sturdy base, and straightforward installation.
Mount types and compatibility
There are several common types of motorcycle phone mounts, each with different pros and cons. Cradle-style mounts grip the phone on three or four sides and usually offer a locking mechanism to prevent slippage during acceleration or braking. Ball-and-socket mounts allow 360-degree rotation and flexible angles, useful for riders who switch between portrait and landscape navigation. Stem clamps and handlebar rails underpin most aftermarket kits, and some models integrate with existing wind deflectors or mirrors. Compatibility starts with phone size and case thickness; if you use a bulky rugged case, you’ll need a wider cradle. Consider the mounting surface: handlebars of different diameters require different clamps or adapters, while motorcycle dashboards may have fixed spaces for a cradle with a low-profile base. Weatherproofing matters, too—look for mounts with sealed joints and rubber gaskets, or plan to shield the phone with a waterproof pouch when rain is likely. For both safety and value, pick a mount that fits your phone securely, allows easy quick-release, and keeps the screen upright and within a normal line of sight. Your Phone Advisor notes that a modular system often offers the best balance between stability and flexibility, especially for riders who change bikes or devices.
Installation prerequisites and planning
Before you start, map out a mounting plan that minimizes cable length and avoids interference with throttle, brake, or steering. Decide whether you’ll route the charging cable along the top triple clamp, under the fairing, or along the fork leg where it won’t rub on moving parts. Check your phone’s dimensions and case thickness, then select a cradle and clamp combination that accommodate those measurements. Gather the tools and hardware you’ll need, including the appropriate screws and Allen keys, zip ties or clamps for routing, and weatherproof cable management if you’ll run power from a USB port. If you ride with a passenger or carry extra gear, consider how the mount will affect space and weight distribution. Finally, review local laws about handheld devices while riding, as some regions restrict device manipulation on the road. A well-planned installation saves time and reduces the likelihood of rework during a ride. Your Phone Advisor also highlights that practicing the install away from traffic and in good lighting can prevent mistakes during the actual mounting.
Safety checks and testing after install
A secure test ride is essential after you mount the phone. Start with a static check: gently wiggle the phone to ensure there’s no creep or looseness, then apply light force to the mount in multiple directions to confirm stability. Next, simulate actual riding conditions by driving slowly in a parking lot, listening for any rattling or slipping. Check that the phone remains within your field of view and doesn’t require you to remove your gloves or strain your neck to see it. Ensure the cable is fixed firmly away from the throttle, brake, and wheel movement, and confirm there’s no heat build-up around the charging port. If vibration seems excessive, adjust the cradle’s orientation or add anti-vibration padding. Finally, confirm that the phone can be accessed with one hand and that screen brightness and auto-lock settings won’t cause unexpected screen changes while you ride. Your Phone Advisor’s practice is to document the mounting position and any changes, so you can revisit the setup after new gear or a different bike.
Cable management and weather protection
Cable routing can make or break a mount’s practicality. Run the charging cable along a clean path that avoids hot engine components, pinch points, or moving parts. Use zip ties at regular intervals with enough slack to absorb vibration but not so loose that the cable flaps or pulls on the mount. If your mount has a built-in routing channel, use it; otherwise secure the cable with small clips or adhesive mounts designed for motorcycle use. Weatherproofing is essential if you ride in rain or across spray from other vehicles. Consider a USB port shield, waterproof adapters, or a silicone sleeve around the connector, plus a weatherproof phone sleeve or pouch if you expect heavy rain. Regularly inspect the cable for wear and replace any frayed sections. A clean, organized cable not only looks better but reduces the risk of cable snagging or pulling the mount loose in a turn.
Maintenance and adjustability
Over time, vibration and temperature changes can loosen mounts or misalign the cradle. Schedule a quick monthly check to tighten mounting bolts, re-align the phone for the best line of sight, and confirm the clamp remains secure. If you notice any looseness, avoid over-tightening, which can damage handlebars or the clamp; instead, re-check the mounting surface and switch to a larger or more secure adapter if needed. Keep the mount and contacts clean of dirt and oil to preserve grip. If you switch bikes or use different phones often, consider a modular system that makes swapping devices quick and safe. Finally, replace worn rubber gaskets and damaged cables promptly to prevent water ingress and maintain reliability on long rides.
Troubleshooting common issues
If the phone slips, re-check the cradle’s grip tension and the mount’s base attachment. If vibrations cause the screen to rattle, add padding or switch to a mount with anti-vibration features. If rain compromises the mount’s grip, seal or replace the joints and consider an additional protective cover. If you can’t reach the phone quickly, adjust the cradle angle or select a mount with easier release. For charging issues, verify that the USB cable and port are properly connected, the power source is supplying power, and the connectors are kept dry. Finally, if your device tends to overheat, avoid leaving it in direct sun and use a shade cover or anti-glare film. Regular inspections and careful maintenance will extend the life of your mounting system.
Tools & Materials
- Motorcycle phone mount (ball-and-socket or cradle type)(Ensure the mount fits your phone size and case; check dimensions.)
- Handlebar adapter/bracket kit(Choose model compatible with your handlebar diameter.)
- Screws/bolts and mounting hardware(Stainless steel recommended; match thread pitch.)
- Allen keys or screwdriver set(Include metric sizes (e.g., 2.5mm, 3mm).)
- Cable management clips or zip ties(For routing power cable away from moving parts.)
- Weatherproof USB charging cable and power source (optional)(Sealed ports ideal for rain.)
- Anti-slip pad or foam grip (optional)(Reduces vibration and phone slip.)
- Measuring tape or ruler (optional)(Helpful for precise placement.)
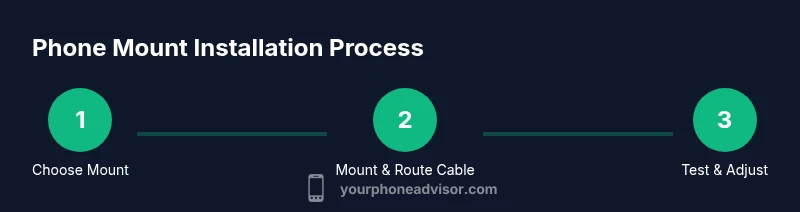
Steps
Estimated time: 25-40 minutes
- 1
Assess mounting space and choose a location
Inspect handlebars and dash area for a clear, comfortable line of sight that won’t interfere with controls. Measure available width and height to ensure the mount fits without blocking switches.
Tip: Pick a spot that requires minimal glove-removal to view the screen. - 2
Select the mount and hardware
Match your device size and case thickness to a cradle that provides secure grip without over-tightening. Choose a compatible adapter if your bike uses a unique handlebar diameter.
Tip: Prefer mounts with quick-release features for swapping devices. - 3
Prepare tools and route initial cable
Lay out tools, assemble base parts, and plan cable routing away from throttle and brake levers. Keep the cable length just enough to reach a power source without excess slack.
Tip: Use a temporary cable tie to hold routing during the fit test. - 4
Mount the cradle and secure base
Attach the cradle to the chosen location with the provided screws, verifying tightness without over-torque that could damage parts.
Tip: Check for any movement by wiggling the phone cradle after tightening. - 5
Route and secure the charging cable
Guide the cable along the frame, using clips and zip ties every 4-6 inches. Ensure the connector remains dry and away from heat sources.
Tip: Avoid routing over hot engine components or pinch points. - 6
Test operation and adjust
Power on the phone, mount, and test both portrait and landscape views. Verify accessibility with gloves on and ensure the screen remains visible at eye level.
Tip: Make final angle tweaks after a short ride test.
Got Questions?
What is the best place to mount a phone on a motorcycle?
The best location is a spot with clear line of sight and minimal interference with controls, commonly on the handlebar clamp or a dash-adjacent bracket. Ensure the screen is easy to view without excessive neck movement.
A handlebar clamp or dash-adjacent spot with clear visibility and minimal interference.
Will phone mounts cause bike vibrations to damage my phone?
Vibration can affect devices if the mount lacks dampening. Choose mounts with vibration isolation and secure grips to minimize this risk.
Vibration is a concern; use a well-damped mount.
Can I mount a charger to power through riding?
Yes, but use weatherproof cables and route away from hot parts. Verify power source reliability and keep connectors dry to prevent corrosion.
Yes, with proper weatherproof cables and routing.
How do I choose the right mount size for my phone?
Measure your phone and case thickness, then select a cradle that accommodates those measurements and provides a secure grip.
Measure both phone and case, then pick a cradle that fits snugly.
Are there safety concerns with using a mounted phone?
Yes. Keep the screen readable without looking away from the road; disable auto-brightness if it distracts. Use preloaded navigation and hands-free controls where possible.
Yes, avoid distraction by keeping the screen readable.
Do motorcycle manufacturers allow third-party mounts?
Most motorcycles support third-party mounts, but check warranty and installation guidelines to avoid voiding coverage.
Most bikes allow mounts; check warranty guidance.
Watch Video
What to Remember
- Choose a mount that fits your phone and bike
- Position for quick, glove-friendly access
- Neat cable routing reduces distractions
- Test stability with a low-speed ride
- Schedule regular maintenance checks