How to Clean Phone Camera Lens
Learn how to safely clean your phone camera lens to restore clarity. This guide covers materials, safe methods, step-by-step instructions, common mistakes, and maintenance tips for better photos and longer lens life.

This guide teaches you how to clean phone camera lens safely and effectively, removing fingerprints, dust, and smudges to restore image clarity. You’ll learn why lens cleanliness matters, the right materials, and a step-by-step method that minimizes risk to coatings and sensors. Follow these steps to keep your photos sharp and true to color.
Why cleaning your phone camera lens matters
A clear camera lens is essential for sharp, color-accurate photos. Dirt, fingerprints, and dust create glare, softness, and reduced contrast, especially in low light or when using digital zoom. The practice of how to clean phone camera lens matters because even small smudges can degrade image quality across scenes—from landscapes to close-ups. By adopting a safe cleaning routine, you preserve the lens coatings and maintain optimal sensor performance, which Your Phone Advisor consistently highlights as part of responsible device upkeep.
What makes a lens dirty and how it affects photos
Lenses accumulate grime from everyday use—lipstick fingerprints, sweaty hands, soap residue, and airborne dust. Water droplets can leave micro-mist that dries into a film, while skin oils leave oily smears. These contaminants scatter light, reducing sharpness and color fidelity. The result is photos with hazy areas, ghosts, or a loss of micro detail. Regular, gentle cleaning helps maintain image clarity and saves you from retaking photos in challenging lighting.
Safe cleaning materials: what you can use
Choose materials designed for optics. A high-quality microfiber cloth is essential because it lifts oils rather than grinding particles into the coating. Use a lens-safe cleaning solution or distilled water in small amounts on the cloth—not directly on the lens. Cotton swabs are useful for the edges, but avoid leaving fibers behind. If you don’t have lens-specific products, a damp microfiber cloth with a touch of distilled water is acceptable. Never use abrasive cleaners, ammonia, or household solvents on the lens coatings.
Step-by-step cleaning overview
This section provides a high-level roadmap for how to clean phone camera lens without risking damage. Start by powering down the device, removing loose particles, applying a light dampening, and finishing with a dry buff to remove streaks. Each camera lens area may have slight curvature, so use gentle, circular motions that radiate from the center outward. Always assess the results by testing with a photo to confirm there are no remaining streaks or halos.
Common mistakes and safety warnings
Avoid spraying liquids directly onto the lens; liquids can seep into gaps and cause damage. Do not rub hard or use rough fabrics that can scratch coatings. If you see deep scratches or hazy film that won’t come off, pause and consider professional inspection. For coated lenses, aggressive cleaning can degrade coatings over time. Patience and minimal moisture yield the best long-term results.
Dealing with stubborn smudges and residue
When fingerprints or oil persist, switch to a clean microfiber patch and reapply a tiny amount of lens-safe cleaner. Work in small circular motions, re-wipe with a dry section, and inspect under bright light. For sticky residues, a gentle dab with a slightly dampened cloth and a careful second pass can help, followed by a final dry wipe to remove any leftover moisture.
Cleaning around protective filters or cases
If your phone uses a protective filter or case with a built-in lens, clean both surfaces carefully. Remove the case if possible to access the lens edge without obstructing airflow. When cleaning any outer filter, use light pressure and avoid gaps where dust can accumulate. After cleaning, reassemble and test with a quick photo to verify no edge smudges remain.
Maintenance tips to prevent future grime
Create a simple routine: visually inspect the lens after handling the phone, clean as needed, and store the device in a clean pocket or case. Consider a small travel kit with a microfiber cloth and lens-safe cleaner so you can address smudges on the go. Avoid placing the phone face-down on dirty surfaces, and keep a separate cleaning cloth dedicated to the camera area to prevent cross-contamination with screens.
Quick quality checks after cleaning
Take a few short test shots under different lighting to confirm clarity and color accuracy. Zoom in on fine textures like leaves or patterned fabrics to check for micro-scratches or streaks. If anything looks off, repeat the gentle cleaning steps with a fresh cloth. Regular checks help ensure your lens remains in peak condition.
Final considerations for different devices
Different phone models have varying coating types and lens geometries. Always consult your device’s manual or the manufacturer’s guidelines before aggressive cleaning. For devices with rain or splash exposures, consider more frequent inspection and gentler cleaning methods to preserve protective coatings over time.
Tools & Materials
- Microfiber cleaning cloth(Lint-free, ultra-soft to avoid scratching coatings)
- Lens-safe cleaning solution(Formulated for optical coatings; use sparingly)
- Distilled water(Use only if lens-safe cleaner is unavailable)
- Cotton swabs(Edge cleaning; avoid shedding fibers)
- Soft brush or blower(Gently remove loose dust before wiping)
Steps
Estimated time: 8-15 minutes
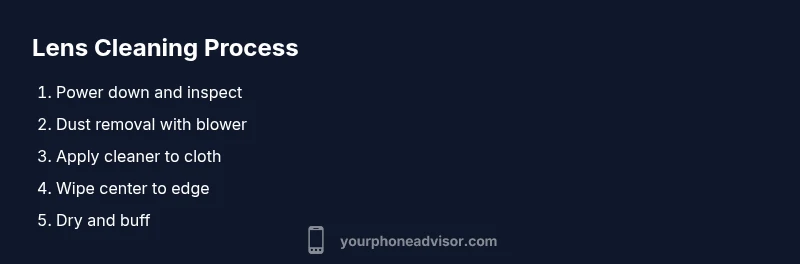
- 1
Power down and inspect the lens
Turn off the phone to prevent accidental taps while cleaning. Visually inspect the lens for visible dust, fingerprints, or smudges. If you notice any cracks or condensation, stop and seek professional help.
Tip: Powering down reduces the risk of moisture entering the phone internals during cleaning. - 2
Remove loose particles with a blower
Hold the phone with the camera facing up and gently blow air from a short distance to dislodge loose dust. Do not shake or rub vigorously. If available, use a soft brush to sweep away particles from the edge and corners.
Tip: Keep the blower at about 2–3 cm from the lens to avoid moisture transfer. - 3
Apply cleaner to the cloth, not directly on the lens
Dampen a corner of the microfiber cloth with lens-safe cleaner or distilled water. Gently mist the cloth, not the lens. Wipe in small circular motions from the center outward to lift oils without soaking the glass.
Tip: Avoid pooling liquid near the edges where moisture can seep into the housing. - 4
Wipe and dry with a clean section
Use a dry portion of the microfiber cloth to remove any remaining moisture and buff the lens to a streak-free finish. If streaks persist, switch to a fresh area of the cloth and repeat slowly.
Tip: Always finish with a dry wipe to prevent film formation. - 5
Test with a quick photo
Take a short photo in good lighting to check clarity and color. Look for halos, smudges, or blur. If necessary, repeat steps 3–5 with a new cloth.
Tip: Testing after cleaning confirms success before you rely on the lens in important moments. - 6
Store properly and maintain
Return the phone to its case or pocket, avoid placing the lens face-down on rough surfaces, and keep the cleaning kit handy for quick touch-ups.
Tip: Establish a small, dedicated kit for camera care to simplify routines.
Got Questions?
Can I use water or household cleaners on the camera lens?
Use distilled water or a lens-safe cleaner with a microfiber cloth. Avoid household cleaners and ammonia, which can damage coatings. Never spray directly onto the lens.
Distilled water or a lens-safe cleaner on a microfiber cloth is safest. Do not spray cleaners directly on the lens.
Will cleaning damage my phone’s camera?
When done gently with proper materials, cleaning is safe and helps preserve image quality. Avoid excessive moisture and aggressive rubbing that could affect coatings or seals.
Cleaning is safe if you use gentle motions and proper materials; avoid soaking or rubbing hard.
How often should I clean the lens?
Clean when you notice smudges, dust, or reduced clarity in photos. Frequent light cleaning is better than letting grime accumulate, especially in humid or dusty environments.
Clean when you see smudges or blurred photos; don’t wait too long in dusty environments.
What should I do if there is a scratch on the lens?
A scratch may require professional assessment. Do not attempt abrasive polishing; it can worsen the damage or affect coatings.
If you suspect a scratch, get a professional opinion rather than trying to fix it at home.
Is it okay to use rubbing alcohol?
Rubbing alcohol is not recommended for most phone lenses as it can degrade protective coatings. Prefer lens-safe cleaners or distilled water.
Avoid rubbing alcohol on camera lenses; use lens-safe cleaners instead.
Should I clean the lens when the phone is wet?
Wait for the phone to air dry before cleaning. Moisture can spread more easily and enter gaps, risking internal damage.
Wait until the phone is dry before cleaning to prevent moisture getting inside.
Watch Video
What to Remember
- Use gentle, lens-safe products and soft cloths.
- Never spray liquids directly on the lens.
- Test with photos to verify clarity after cleaning.
- Maintain a simple routine to prevent grime buildup.
- Protect lenses with cases or covers when not in use.